Axis Utility
A precision stereo utility: independent channel gains, mid/side control, panning, stereo imaging, phase and timing alignment, and professional metering — goniometer, correlation, LUFS (short-term, momentary & integrated) and crest-factor / RMS readouts, and a real-time spectrum analyzer.
macOS & Windows — VST3, CLAP, AU (macOS), and standalone application · 44.1–192 kHz
Introduction
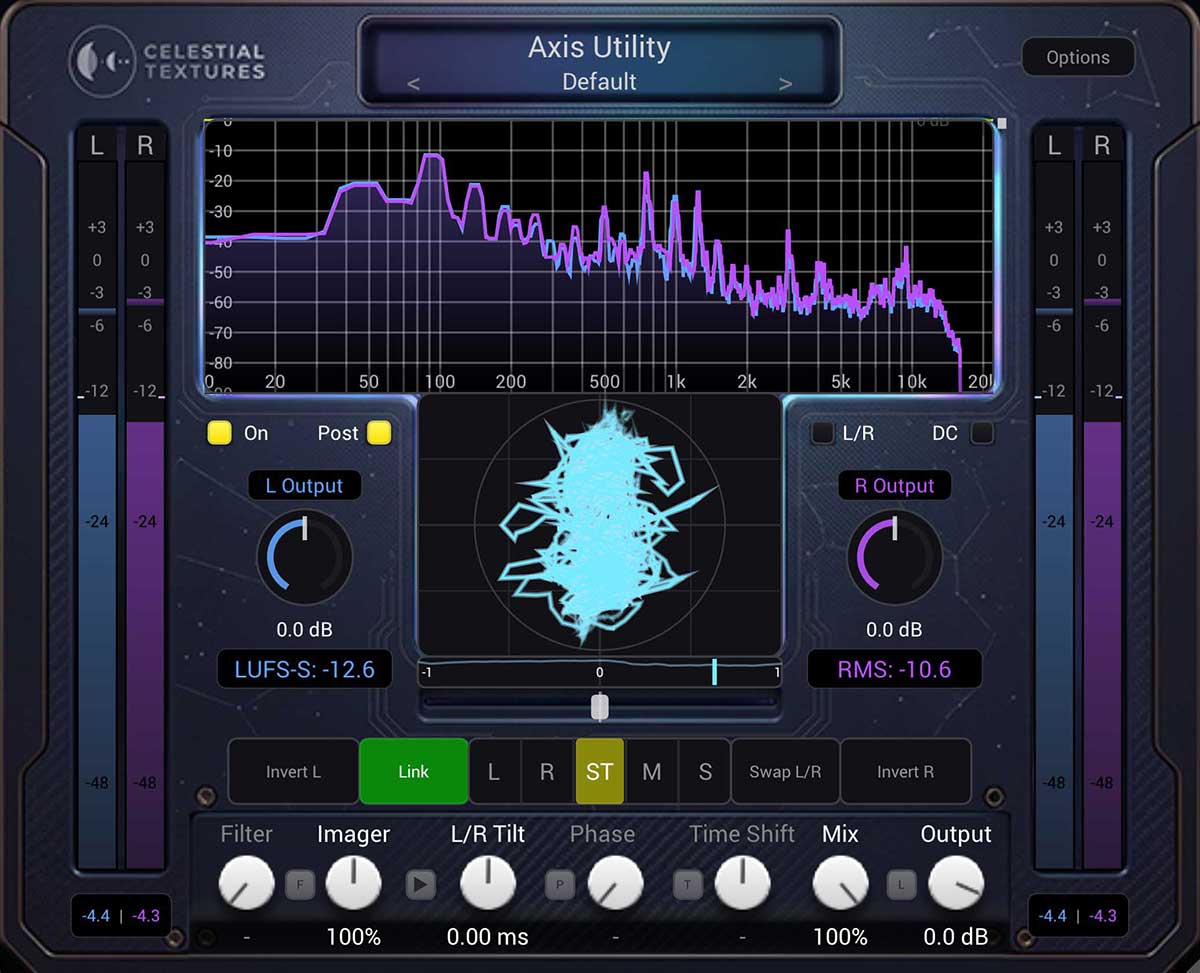
Conventions. Throughout this manual, Left and Right are shown in the channel colours (blue / purple by default). You can change these colours in the Options panel; the meters, analyzer and goniometer all follow your choice. Factory settings are marked with factory default.
Quick Start
- Install the plugin for your platform (macOS / Windows) and rescan plugins in your DAW.
- Insert Axis Utility on a stereo track or bus.
- Play audio. The meters, goniometer and analyzer come alive immediately.
- Use the big Left / Right knobs to trim channel levels, or turn on M/S Mode to work in Mid/Side instead.
- Reach for Imager to widen or narrow the stereo image, and watch the correlation meter to keep things mono-safe.
- Open Options to set channel colours, the limiter ceiling, and metering preferences, or click the preset name to audition factory programs.
Tip — metering shortcuts.
- Right-click the LUFS or Crest/RMS readout, any peak value, or an IN/OUT meter label to reset metering (loudness windows, crest/RMS integration, and level-meter peaks).
- Left-click the LUFS readout to cycle ST → M → I; left-click Crest/RMS to switch between Crest Factor and RMS.
- When View → Peak Hold is on in the analyzer menu, a metering reset also clears the spectrum peak hold.
- Most knobs reset to default on double-click.
Installation — macOS
Axis Utility for macOS ships as plug-in bundles, an optional Audio Unit (AU), and an optional standalone application. System requirement: macOS 11.0 (Big Sur) or later, Apple Silicon or Intel.
Use the macOS .pkg installer, or copy each bundle to the system location below
(all plug-ins install under /Library/Audio/Plug-Ins/ for every user on the Mac).
| Format | Install location |
|---|---|
| VST3 | /Library/Audio/Plug-Ins/VST3/Celestial Textures/Axis Utility.vst3 |
| CLAP | /Library/Audio/Plug-Ins/CLAP/Axis Utility.clap |
| AU | /Library/Audio/Plug-Ins/Components/Axis Utility.component |
| Application (.app) | /Applications/Celestial Textures/Axis Utility.app |
- Quit your DAW (for plug-in installs).
- Copy the format(s) you use into the matching folder above, or run the installer.
- Re-open your DAW and rescan / validate plugins.
- If macOS warns the app is from an unidentified developer, right-click the app and choose Open the first time, or allow it under System Settings → Privacy & Security.
Where settings live. Your channel colours, limiter settings, and preferences are stored under
~/Library/Application Support/Celestial Textures/Axis Utility/.
Window zoom: per plug-in instance in the DAW project (VST3/CLAP/AU); the standalone APP remembers zoom separately.
HTML manual (after installer).
~/Library/Application Support/Celestial Textures/Axis Utility/manual/index.html
Installation — Windows
Axis Utility for Windows ships as a plug-in and an optional standalone application. System requirement: Windows 10 or later, 64-bit.
Use the Windows installer, or copy each component to the location below.
| Format | Install location |
|---|---|
| VST3 | C:\Program Files\Common Files\VST3\Celestial Textures\Axis Utility.vst3\ |
| CLAP | C:\Program Files\Common Files\CLAP\Axis Utility.clap |
| Application (.exe) | C:\Program Files\Celestial Textures\Axis Utility\Axis Utility.exe |
- Close your DAW.
- Run the installer, or copy the bundles above into those folders.
- Re-open your DAW and rescan plug-ins.
- HTML manual (after installer):
%ProgramData%\Celestial Textures\Axis Utility\manual\index.html
Where settings live. License, presets, and UI preferences are stored under
%ProgramData%\Celestial Textures\Axis Utility\.
The Standalone Application
The standalone app runs Axis Utility without a DAW — handy for quick checks, calibration, or metering a hardware input. It is the same plugin wrapped with its own audio engine.
| Platform | Typical location |
|---|---|
| macOS (installer) | /Applications/Celestial Textures/Axis Utility.app |
| Windows (installer) | C:\Program Files\Celestial Textures\Axis Utility\Axis Utility.exe |
- macOS menu bar: File (Preferences, Quit), View (Analyzer, Goniometer — same options as right-clicking those scopes), Window (Minimize, Zoom, Bring All to Front), Help (About, Manual).
- Windows menu bar: File (Preferences Ctrl+,, Quit), View (Analyzer, Goniometer), Help (About, Manual).
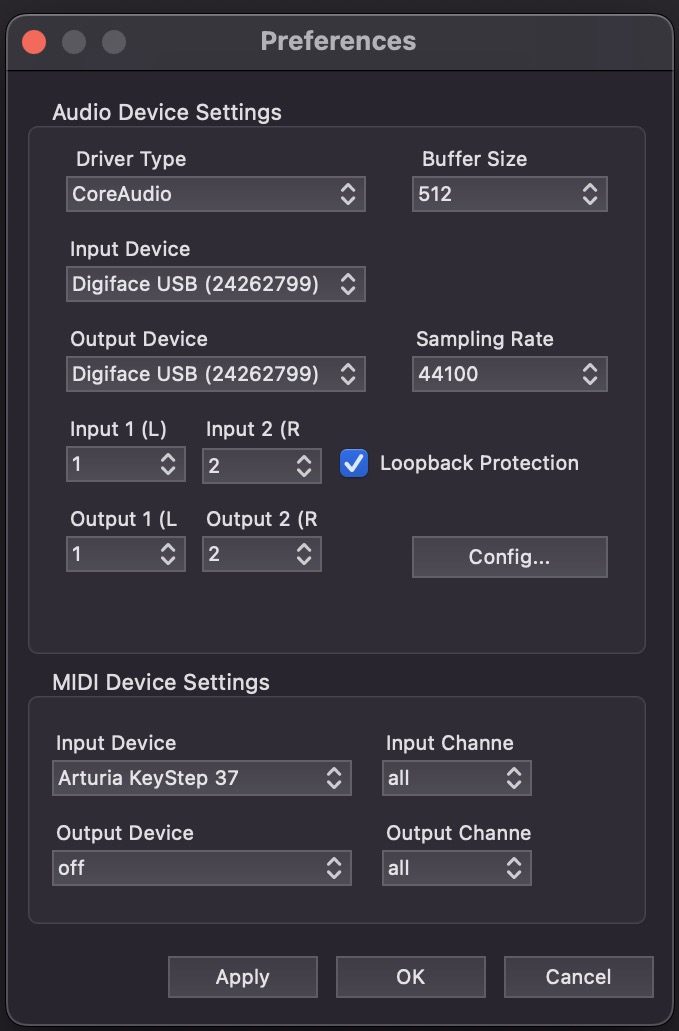
- Audio setup: open Preferences / Settings to choose the audio driver, input/output device, sample rate, buffer size and the exact input/output channel pair.
- Loopback Protection: when the same device is used for input and output on the same channels, enable this checkbox to mute output and avoid feedback.
- About: Help → About shows the version and credits.
- Manual: Help → Manual opens the installed HTML manual
(
~/Library/Application Support/Celestial Textures/Axis Utility/manual/index.htmlon macOS;%ProgramData%\Celestial Textures\Axis Utility\manual\index.htmlon Windows). If the manual is not installed yet, the app opens the online manual. - Remembered session: Preferences keep your audio/MIDI setup and window position. The app reopens with its last plugin state (including analyzer/gonio views and the selected preset). Window zoom is remembered separately. Presets do not store zoom.
- External windows (APP only): right-click the spectrum analyzer or goniometer → External Window. Each detached window has its own view menus (Source, Channel/Mode, Link Switches, etc.) — not copied from the main plugin UI. Both external windows can be open at once.
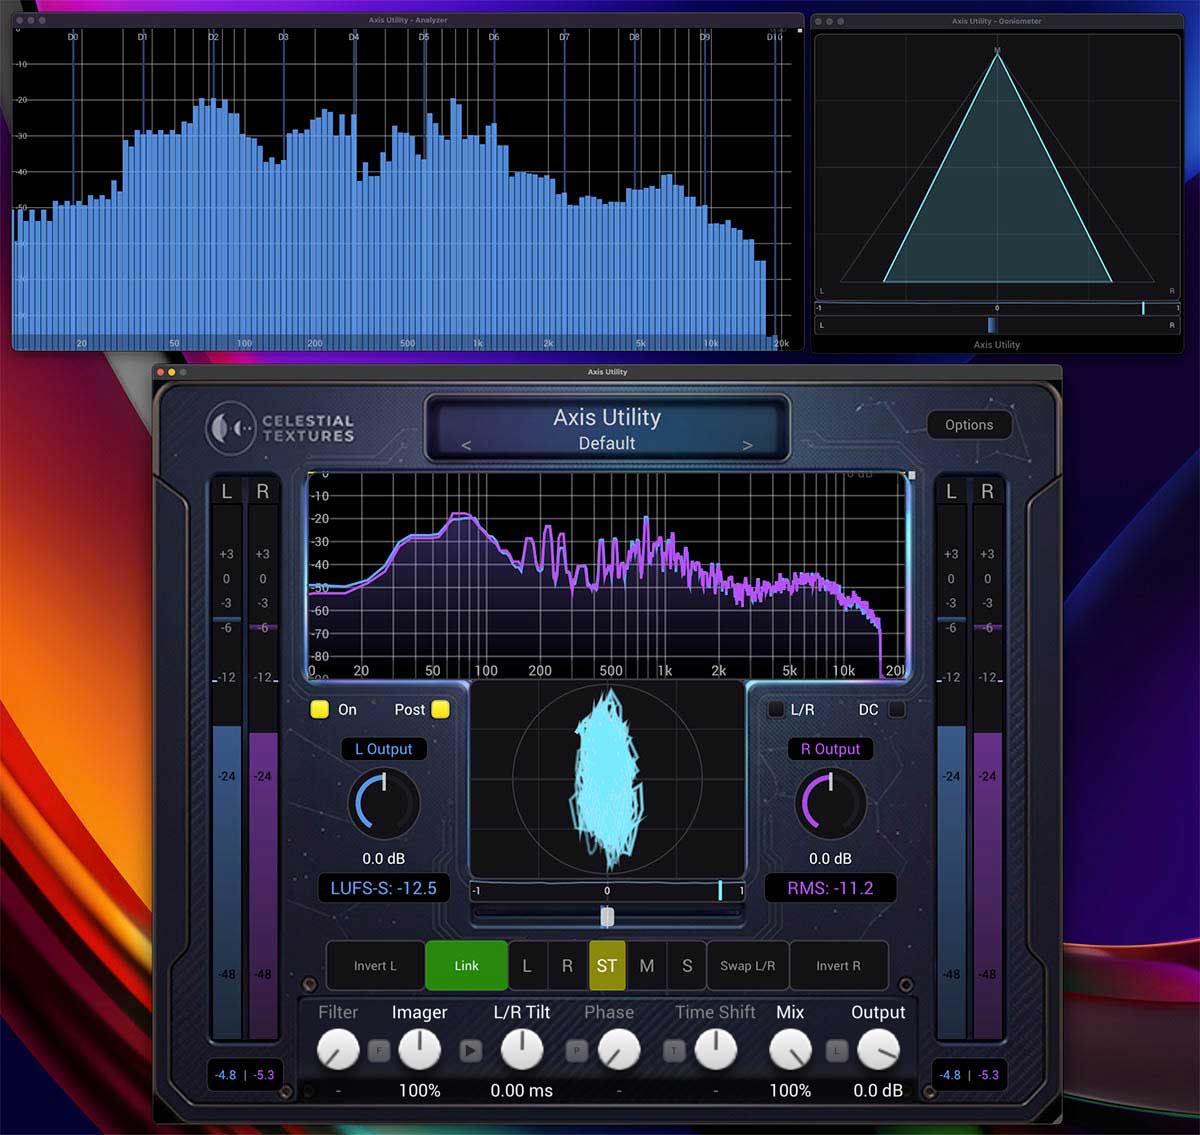
Window Overview
The interface is organised into a few clear zones. The screenshot below labels each one; the sections that follow describe them in detail.
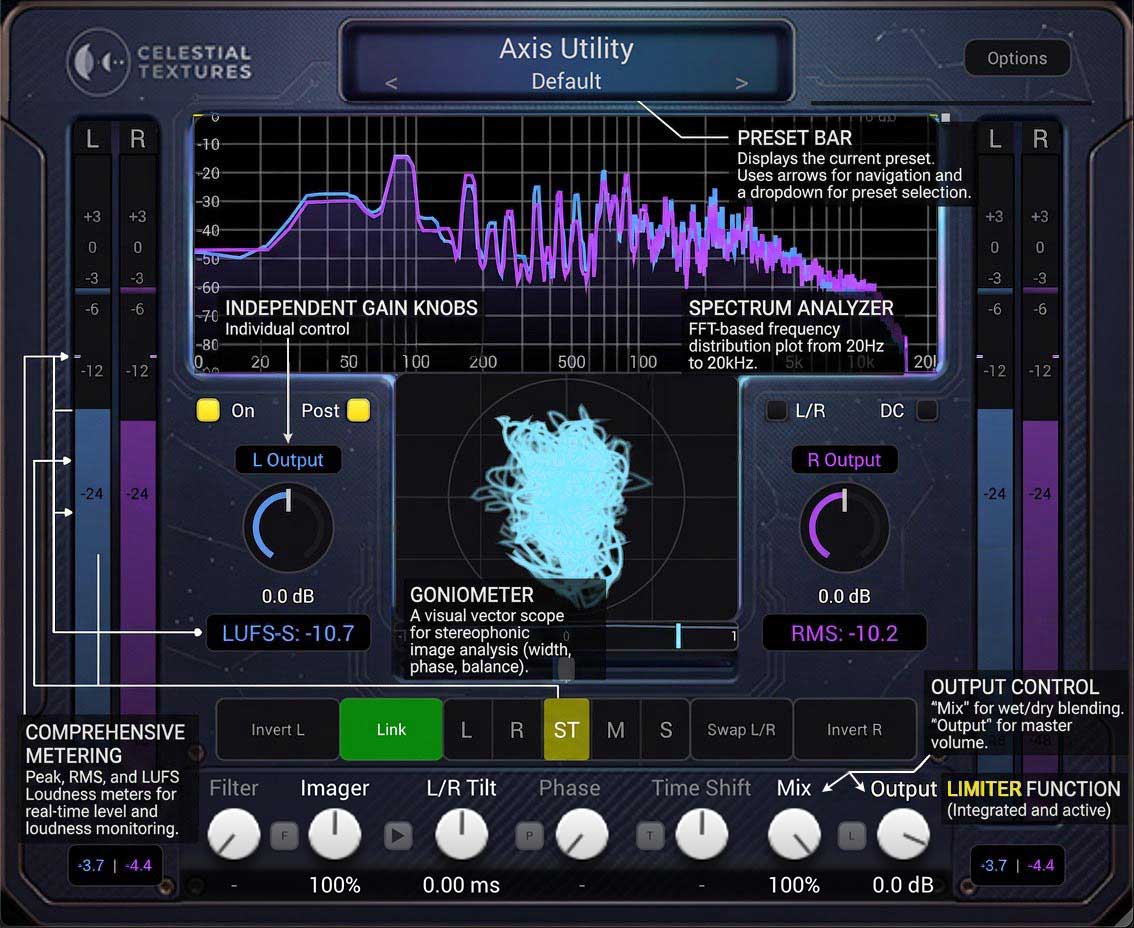
| Zone | What it does |
|---|---|
| Title / Bypass | Plugin name doubles as an in-plugin bypass toggle. Status badges: DEMO (trial), UPDATE! (newer version), LICENSE ERROR (verification failure). |
| Preset bar | | < | preset name | > | under the title — click the name for the preset menu; arrows step presets. |
| Top bar | Options button and analyzer on/off toggle. |
| Gain knobs | Independent Left/Right (or Mid/Side) input and output trims, with Link. |
| Channel tools | Swap, Invert L/R, Listen mode, M/S, DC Block, Pre/Post. |
| Imaging & timing | Imager + Filter, Phase P + knob, Time Shift T + knob, L/R Tilt. |
| Output stage | Mix, Output and the Limiter. |
| Metering | Level meters, loudness & dynamics, correlation/balance. |
| Scopes | Goniometer and spectrum analyzer (both double-click to fullscreen). |
Resizing. Drag the bottom-right corner to scale the whole window. In plug-in formats, zoom is saved per instance in the DAW project. In the standalone APP, zoom is remembered with the app. Presets do not store window zoom.
Signal Flow
Audio splits into a dry reference and a wet processed path, then blends at Mix. Master Output and the Limiter sit on the combined result.
Block diagram
Dry path — reference
Wet path — processed
Mental model
| Stage | Role |
|---|---|
| Dry | Untouched DAW input — delay-aligned when Mix is between 0% and 100% and Filter, Phase, or Time Shift is on. |
| Wet | Input trim → FX → output trim → Swap |
| Mix | Equal-power blend between dry and wet |
| Output dB / Limiter | On the mixed signal |
Gains
All eight gain trims stay active. The Pre/Post switch only changes which pair the large knobs edit and what the meters show — it does not bypass the other pair.
| UI switch | Knobs edit |
|---|---|
| Pre + L/R | Input L · Input R |
| Pre + M/S | Input Mid · Input Side |
| Post + L/R | Output L · Output R |
| Post + M/S | Output Mid · Output Side |
Swap
End of wet path, before Mix. Output meter labels swap when Swap is on.
Analyzer taps
| Raw | DAW input |
| Wet | Post-FX + output gains + Swap, pre-Mix |
| Post | Mix + Output dB + Limiter |
Latency & delay compensation. Axis Utility reports latency to the host (PDC): 0 samples normally; +50 ms when Time Shift T is on; +128 samples when the Imager Filter is on; plus the Phase rotator's group delay when the Phase P switch is on. When you blend dry and wet, the dry path is automatically delay-aligned to match the wet path (internal only — no extra reported latency).
Input & Output Gains
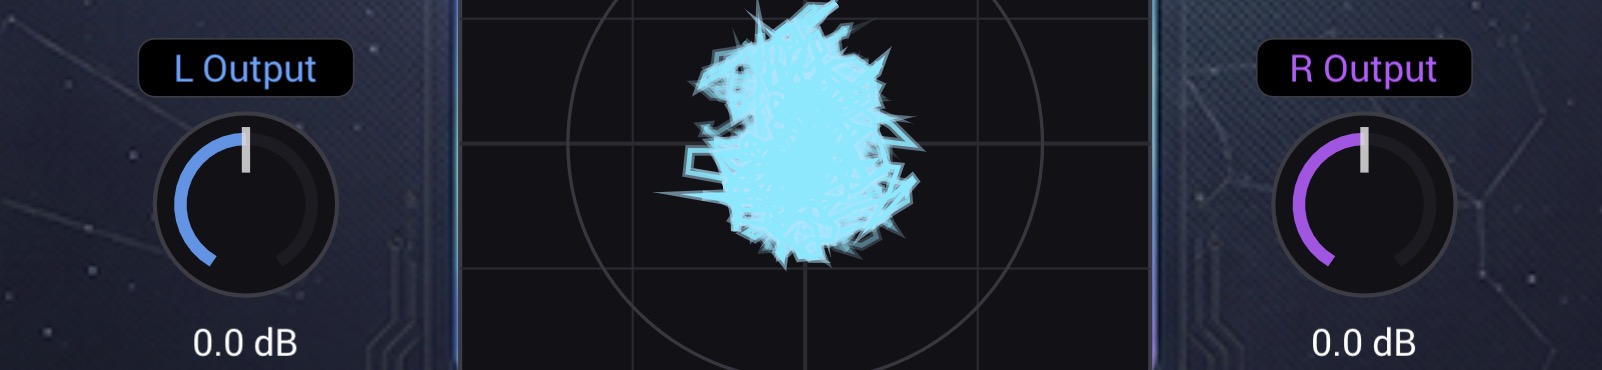
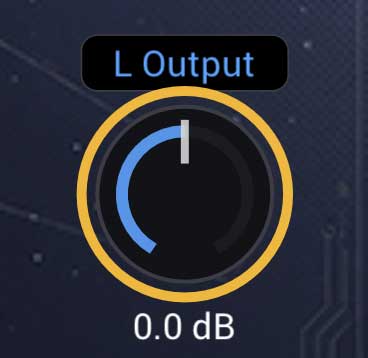
The two large knobs are the heart of the plugin. By default they trim the Left and Right output channels; with M/S Mode on, they trim Mid and Side instead. There are also matching input trims applied at the very start of the chain. All eight trims start at 0 dB factory default.
Link Channels
Engage Link to move both knobs together, preserving the offset between them — ideal for riding overall level without changing balance. Link is on by default factory default. Disable it to set each channel independently.
Adjusting trim
- Drag or scroll on the knob (not the title or dB readout).
- Double-click the dB readout below a knob to type a new trim (−60 … +12 dB, or
-inf). Press Return or the numeric keypad Enter to apply. - Double-click the knob to reset that channel to 0 dB.
Ctrl+double-click the knob to reset all eight gain trims (L/R/M/S Input and L/R/M/S Output) to 0 dB at once.
- In Pre mode, titles read e.g. L Input.
For beginners
Think of these as a fine left/right balance and trim. If one side of your mix feels louder, nudge that channel down a little.
For advanced users
Gains are stored and automated in dB. The input trims sit before the effect chain (so they change what the imager, phase and meters see in Pre mode), while the output trims sit at the end of the wet path (just before Swap and Mix); master Output dB is after the blend.
M/S Mode
The M/S switch flips the gain knobs and the level metering from Left/Right to Mid (the mono centre, what both channels share) and Side (the stereo difference, what makes a track wide).
- Turn Mid down to thin the centre; turn Side up to widen.
- The meters relabel themselves M IN / S IN (or M OUT / S OUT) so you always know which domain you're in.
- The LUFS and Crest/RMS readouts below the gain knobs still measure the full stereo field (Left + Right), not Mid/Side.
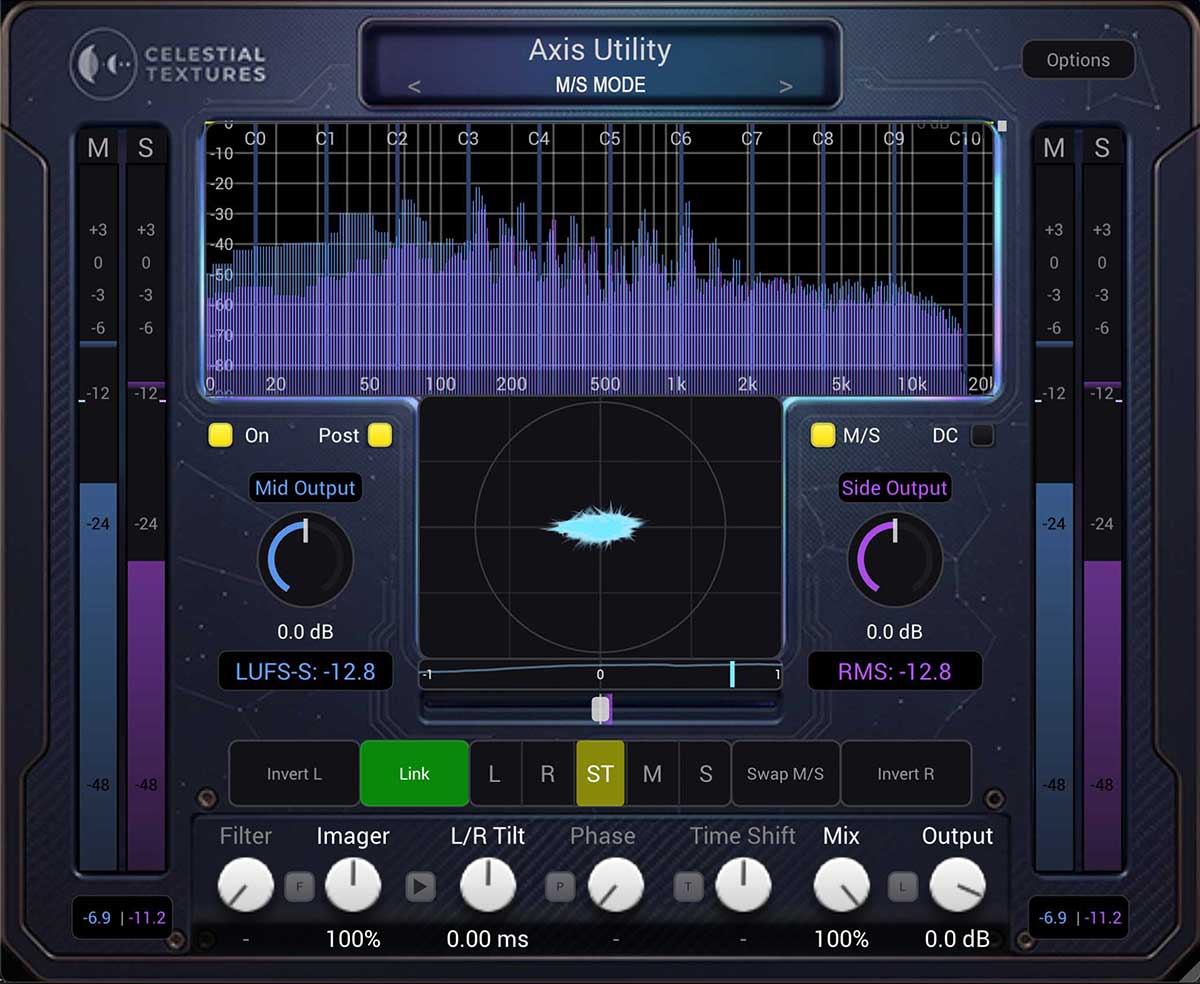
Tip. M/S level changes and the Imager are related but different: M/S gain rebalances centre vs. sides directly, while the Imager applies a width scaling that you can also restrict to high frequencies with the Filter.
Pre / Post
This switch decides what the meters, goniometer and analyzer are measuring:
| Setting | You see… |
|---|---|
| Pre | The signal before Axis Utility processes it (the raw input). |
| Post | The signal after the full chain (the processed output). factory default |
Use Pre to analyse incoming material, and Post to confirm the effect of your changes.

DC Block
The yellow DC toggle inserts a gentle high-pass filter that removes any DC offset (a constant bias that wastes headroom and can cause clicks). Leave it off for normal material; switch it on if a source has visible asymmetry in its waveform or you suspect DC from a hardware capture.
Swap · Invert · Listen Mode

Swap Channels
Exchanges Left and Right on the wet path (after output trim, before Mix). Useful for fixing a reversed cable or mis-recorded stereo pair. In M/S Mode, Swap exchanges Mid and Side instead. Output meter labels and peak readout colours swap to match; input meters and gain knobs keep their normal labels. At Mix below 100%, dry stays in the original orientation — only the wet contribution is swapped.
Invert Ch.1 / Ch.2
Flips the polarity (phase 180°) of the Left or Right channel. Inverting one side is a classic test for mono compatibility and can fix a wiring polarity problem. Inverting both is a full polarity flip.
Listen Mode
A five-way solo for the final wet path (after Imager, Pan, Phase, Time Shift, Tilt, and output L/R+M/S trim — before Swap). Click a cell:
Shift+click L or Shift+click R to hear that channel in both speakers (dual-mono). Two small dots appear under L or R. Click L or R without Shift for that side only; ST / M / S also clears dual-mono.
Tip. Solo S to hear what lives in the stereo sides — reverb tails, width, and any harshness that only appears off-centre. Use Mix 100% for accurate checks: Listen monitors the wet path only (the Listen labels turn red when Mix is below 100% and a solo cell is active).
Pan

The Pan slider places the signal in the stereo field, from full Left through Centre (C) to full Right. A balance indicator overlays the slider so you can see the resulting left/right energy at a glance. Double-click to recentre factory default.
After Imager by design. Pan runs after the Imager/Filter stage so width does not re-centre the image. Panning moves already mono-safe lows as a level/balance shift.
Imager & Filter
The Imager controls stereo width, from 0% (mono) through 100% (unchanged) factory default at noon, up to 400%. Most of the knob above 100% covers up to 200%; the last part of the turn is the extra-wide range. Widening boosts the Side component; narrowing reduces it.
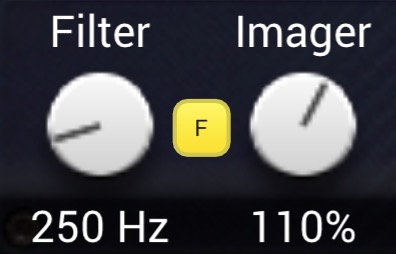
The Filter switch
The yellow Filter switch (between the frequency and Imager knobs) decides where the width applies:
| Filter | Behaviour |
|---|---|
| Off | Full-band imaging — width is applied to the entire signal. No added latency. factory default |
| On | A linear-phase crossover splits the signal: everything below the Mono Filter frequency is summed to mono, while width is applied only above it. Adds 128 samples of (compensated) latency. |
Mono Filter (frequency)
When the Filter is on, this knob sets the crossover point from about 20 Hz to 20 kHz. Raise it to keep more of the low end mono (tight, centred bass) while still widening the highs.
Tip — tight bass, wide top. Turn the Filter On, set the crossover around 120–200 Hz, and push the Imager past 100%. Lows stay mono and powerful; highs and stereo detail open up above the crossover.
Watch the correlation meter. Very wide settings can hurt mono compatibility. Keep an eye on the correlation reading and check in mono.
Phase
The Phase knob applies a continuous broadband phase rotation from 0° to 360° to the wet signal. Unlike a simple polarity flip (which is just 180°), this rotates the phase of every frequency by the same angle while keeping the tone (magnitude) flat.
Enable it with the yellow P switch to the left of the knob (same style as Time Shift T):
| P switch | Behaviour |
|---|---|
| Off | Rotator bypassed — no processing and no added latency. Knob is grayed and shows -; the stored angle is kept. factory default |
| On | Linear-phase FIR rotator is active at the current angle (including 0°, which is a delayed identity). Adds host-compensated group delay so sweeping the knob does not jump latency. |
Why use it?
Phase rotation can improve how a mono-summed signal sits, tame asymmetric transients (e.g. some vocals or kick drums where one side of the waveform peaks much harder), and squeeze a little extra headroom before a limiter. Because both channels are rotated identically, a mono fold never cancels oddly.
Phase Quality. In Options you can choose the rotator's accuracy tier (Standard / High / Ultra). Higher tiers track phase more accurately into the low bass at the cost of slightly more latency and CPU (only while P is on).
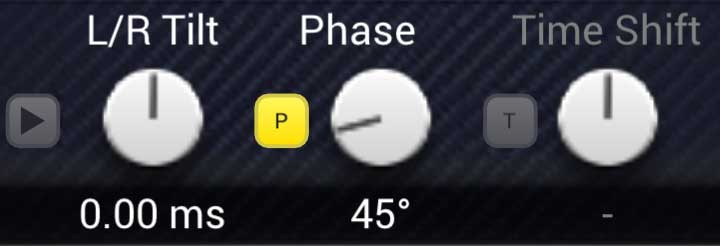
Time Shift
Time Shift slides the whole signal earlier or later in time by up to ±50 ms, with smooth fractional-sample precision. Enable it with the yellow T switch to the left of the knob (same style as Phase P):
| T switch | Behaviour |
|---|---|
| Off | Bypassed — no processing and no Time Shift latency. Knob is grayed and shows -; the stored offset is kept. factory default |
| On | Active at the current offset. Reports a fixed 50 ms base latency so negative shifts (pulling audio earlier) are possible; your shift is the offset relative to that compensated base. |
- Use it to nudge a track's timing against the rest of a mix.
Negative values need delay compensation. Turning T on reports a fixed 50 ms of latency so the knob can go below 0 ms (pull the track earlier than the rest of the mix). On playback that works in hosts that fully delay-compensate (e.g. Cubase, Reaper, Bitwig): 0 ms stays on the grid, negative values move the track forward. In Ableton Live, compensation is often incomplete — then −50 ms simply undoes the delay added when you enabled T, instead of placing the clip earlier. Keep the knob at 0 ms or later, or nudge the clip on the timeline. Live monitoring cannot pull audio earlier than “now” in any DAW.
Tip. For phase/timing alignment between two mics, combine a coarse Time Shift with fine L/R Tilt while watching the goniometer and correlation.
L/R Tilt
L/R Tilt delays one channel relative to the other by up to ±100 ms — the centre position is no delay. In Left/Right mode it tilts L against R; in M/S Mode it tilts Mid against Side.
Tiny inter-channel delays change the perceived stereo position and width (the Haas effect). Larger values create obvious echo-like spreading.
Imager / Tilt order
The small > / < switch between Imager and Tilt chooses order:
| Glyph | Order | Use when… |
|---|---|---|
| > | Imager → Tilt factory default | Subtle movement on already imaged / mono-safe-below-crossover material. |
| < | Tilt → Imager | Mono→stereo: create spread with L/R Tilt, then Filter On to re-mono the lows (L=R below the crossover). |
Comb filtering (L/R mode)
In mono, a large L/R Tilt can colour the sound (comb filtering). Time Shift does not change that — it moves both channels together. Only the Tilt difference between Left and Right matters.
Mono-safety cue. In L/R mode, when |Tilt| is above ~5 ms the Tilt label turns amber unless Tilt is Pre-Imager (<) and Filter is On (lows are re-mono'd after the delay). That clears the L≠R differential in the bass — it does not mean “zero spectral coloration” everywhere.
Mix
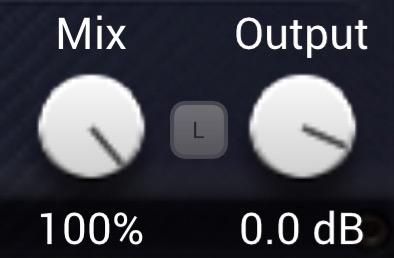
The Mix knob blends the processed (wet) signal with the original (dry) input using an equal-power crossfade, so the perceived loudness stays consistent as you blend.
- 100% — fully processed factory default.
- 0% — the unprocessed input passes straight through.
Good to know. The dry side is the raw input from your DAW, automatically delay-aligned to the wet path when both dry and wet contribute at Mix and latency-adding features (Filter, Phase, or Time Shift) are active — so parallel blends stay time-aligned. At 0% or 100% Mix, alignment is bypassed. Master Output and the Limiter apply after the blend.
Output
Master trim on the mixed signal (after dry/wet blend, before the limiter). Range: −120 … +12 dB. Double-click to return to 0 dB factory default.
Knob title. Reads Output when the limiter is off; B.Limiter when the limiter is on with no oversampling; Lim.Nx when limiter oversampling is active.
Gain reduction. While the limiter is on and reducing, the value under the knob shows GR in yellow (how many dB the limiter is cutting). Hover, drag, or type to see and edit the Output trim instead.
Limiter
A brick-wall limiter on the mixed output catches peaks so nothing exceeds your chosen ceiling. Toggle it with the Limiter switch. While it is on, a yellow triangle ◀ sits to the right of the output R (or S) meter — drag it to set the ceiling (0.0 … −24.0 dBFS, 0.1 dB steps). The same value is in Options, along with oversampling. A yellow line in the gap between the output meters hangs from the ceiling down by the current gain reduction — the same amount shown as GR under the Output knob.
| Setting | Range / options | Notes |
|---|---|---|
| Ceiling | 0.0 … −24.0 dBFS factory default −0.2 | The maximum output level. Drag the yellow ◀ on the output meter (value tooltip while you hold), double-click to reset to −0.2, or type it in Options. |
| Oversampling | None · 2× · 4× · 8× · 16× · 32× · 64× · 128× | None factory default. Higher oversampling catches inter-sample peaks more accurately at higher CPU cost. |
Tip. For final limiting before export, try a ceiling of −1.0 dBTP with 4× or 8× oversampling — a safe starting point for lossy-codec headroom.
Level Meters
Gradient input and output meters show signal level in real time, following the Pre/Post switch and the L/R vs M/S mode. Input labels always show the logical channel; output labels and peak colours swap when Swap is on. Each meter shows a live RMS fill plus a peak tick (thin line) at the top of the bar. These are separate from the RMS readout under the right gain knob — see below.
dB scale. Horizontal grid ticks are labelled +3, 0, −3, −6, −12, −24, −48 dB (centred on the tick lines). The vertical scale runs −56 … +9 dB so +3 sits in the top headroom and −48 stays visible — LUFS-S/M/I readouts align with this ruler.
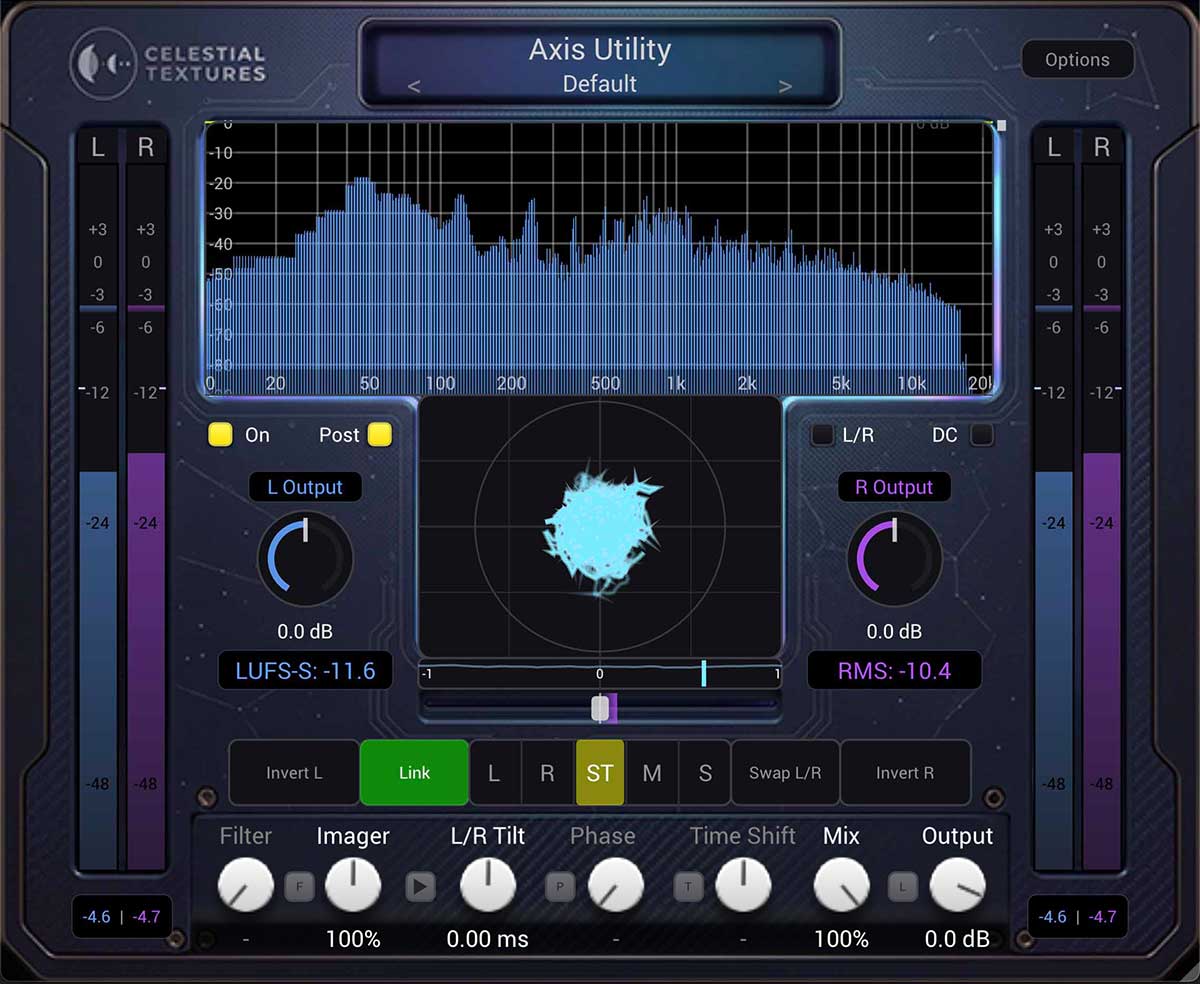
- LUFS markers — horizontal lines on the input and output meters at the current LUFS level (brightened channel colours).
- Peak hold — when View → Peak Hold is enabled in the analyzer right-click menu, the peak tick and numeric readout hold the highest level (timed release or Infinite Hold). With Peak Hold off, peaks use the normal 100 ms hold and 15 dB/s decay.
- Right-click a peak readout or meter label (L IN, R IN, etc.) to reset metering — all loudness windows, crest/RMS integration, and all four peak holds (see Loudness & dynamics).
- Switch between Sample Peak and True Peak (dBTP) readouts in Options.
True-peak readout. With True Peak (dBTP) in Options, the numbers under the output meters hold the highest true peak until you click them (or any metering reset). The meter bars still follow the live level — so a red +0.3 with a quiet bar means an over happened earlier, not that the output is still that hot. Numbers turn red at 0 dBTP or above. Sample Peak numbers keep the usual short hold and decay. Input numbers are always sample peak.
Fill vs peak tick vs RMS label
Each vertical meter has two visuals (fill + peak tick). A third RMS readout sits under the right gain knob in the Loudness & dynamics section. All describe level, but they are not the same measurement and will not always line up pixel-for-pixel.
| Element | Location | What it measures |
|---|---|---|
| Filled bar | Inside each L/R (or M/S) meter | Per-channel short-term RMS (faster than the RMS label) |
| Peak tick | Thin line at top of each bar | Per-channel sample peak |
| Numeric peak | Below each meter pair (e.g. −5.8 | −5.8) | Sample peak per channel, or True Peak (dBTP) on the output pair when enabled in Options (holds the highest dBTP until click) |
| RMS label | Below right gain knob (RMS: −XX.X) | Stereo combined RMS over a 300 ms window (always L/R stereo, even in M/S Mode) |
| Limiter GR | Yellow line between the output L/R (or M/S) bars | How many dB the limiter is cutting, hanging from the ceiling (limiter on only) |
| Ceiling handle | Yellow ◀ to the right of the output R (or S) bar | Drag to set the limiter ceiling (limiter on only; same value as Options) |
- On dynamic material, the peak tick and numeric peak sit above the filled bar — that gap is crest factor (transients vs average level).
- The RMS label and filled bar are both RMS, but the label is slower (300 ms, whole stereo) while each fill is faster and per channel. For steady tones they are usually close (e.g. −11.7 vs ~−12); on moving programme they can diverge.
- LUFS (left readout) is separate perceived loudness (EBU R128), not the same as either RMS display.
Loudness & dynamics readouts
Two numeric readouts sit under the input gain knobs: LUFS below the left knob (in your Left channel colour) and Crest Factor / RMS below the right knob (in your Right channel colour). Both follow the same Pre/Post point as the vertical level meters.

LUFS — EBU R128 loudness
Perceived loudness using ITU-R BS.1770 K-weighting. Left-click the readout to cycle the display mode; the label updates to match:
| Label | What it shows | Best for… |
|---|---|---|
| LUFS-ST | Short-term loudness — a sliding 3-second window. factory default | Judging perceived level while you mix or master. |
| LUFS-M | Momentary loudness — a very short window (about 0.4 s). | Spotting quick level changes, hits, or fades. |
| LUFS-I | Integrated loudness — gated sum from the last metering reset (or since the plug-in was inserted). | Overall programme loudness across a section or full pass. |
Silence or extremely quiet material shows −∞. At common sample rates (44.1 / 48 kHz and simple multiples) the readings follow EBU R128 as expected.
Crest Factor & RMS
The right-hand readout opens on RMS level (stereo combined average energy in dB, over a 300 ms window) factory default. This is not the same as the gradient filled bar on the vertical meters — see Fill vs peak tick vs RMS label. Left-click to switch to Crest F. — the difference between peak and RMS in dB (how punchy vs dense the signal is):
- High crest factor — dynamic, transient-rich material (drums, acoustic sources).
- Low crest factor — heavily limited or dense material.
- RMS — plain average level in dB for the same 300 ms window.
Reset & flash
Right-click either readout (or any peak value / IN·OUT meter label) to run a combined metering reset: clears LUFS short-term, momentary and integrated windows; crest/RMS integration; and all four level-meter peak holds. If View → Peak Hold is enabled in the analyzer menu, the spectrum peak hold is cleared too. The LUFS and Crest/RMS labels flash briefly to confirm.
Tip. Use LUFS-ST for day-to-day level checks, LUFS-I after a full play-through (reset first), and Crest F. to see how much dynamic headroom remains before limiting.
Correlation & Balance
Correlation meter
An indicator running from −1 to +1 that tells you how the two channels relate. Scale labels −1 and +1 sit vertically centred on the bar; a rolling mini-graph shows recent correlation history. Below the bar, a readout shows Corr ±X.XX and Width XX%. If correlation falls below about −0.3, a flashing MONO! warning appears — check mono compatibility.
| Reading | Meaning |
|---|---|
| +1 | Identical channels — effectively mono, perfectly mono-compatible. |
| 0 | Wide, decorrelated stereo. |
| −1 | Channels out of phase — will largely cancel in mono. Investigate. |
Balance meter
A gradient bar (coloured per your channel colours) showing whether energy leans Left or Right — a quick visual check that your mix isn't lopsided.

Goniometer
The goniometer draws the relationship between Left and Right as a live "phase scope", so you can see width, balance and phase. A CRT-style phosphor trail (Normal decay by default) keeps recent motion visible as a smooth, readable display.
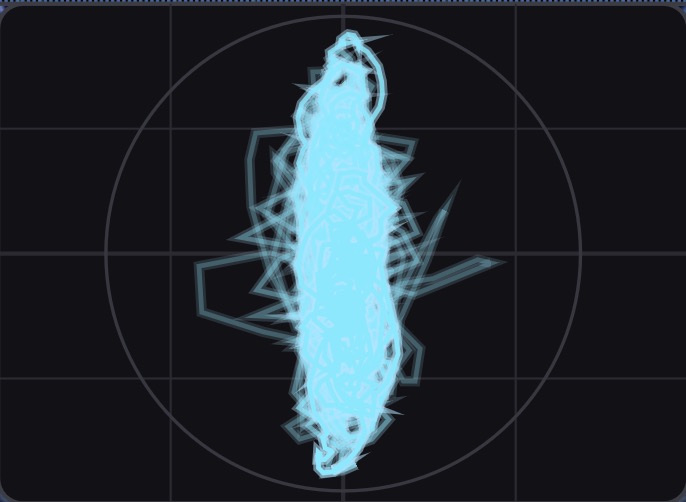
Display modes
Right-click the goniometer (or use View → Goniometer in the standalone app):
Source & display settings
- Source — Input, Output, or Wet (independent from the analyzer). Output factory default on analyzer and goniometer.
- Auto-Gain — rolling-peak level normalization for Lissajous, M/S, Polar, Dot, and X/Y (in the Mode submenu). On factory default keeps quiet and loud material visible; off uses a fixed plot scale. Not available in Balance-O-Meter mode (menu entry is greyed out).
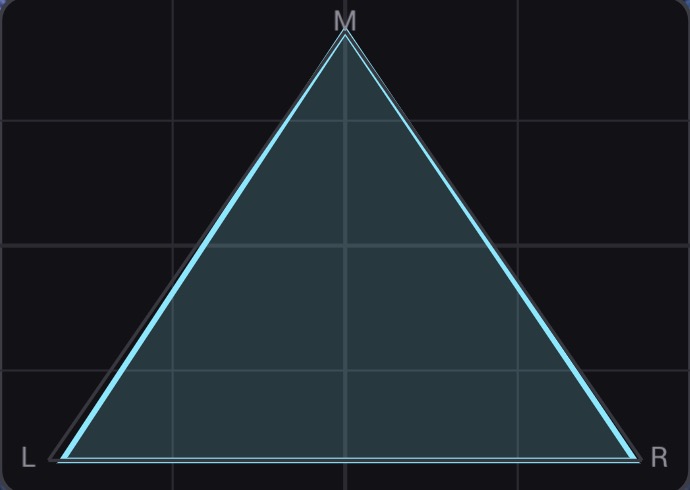
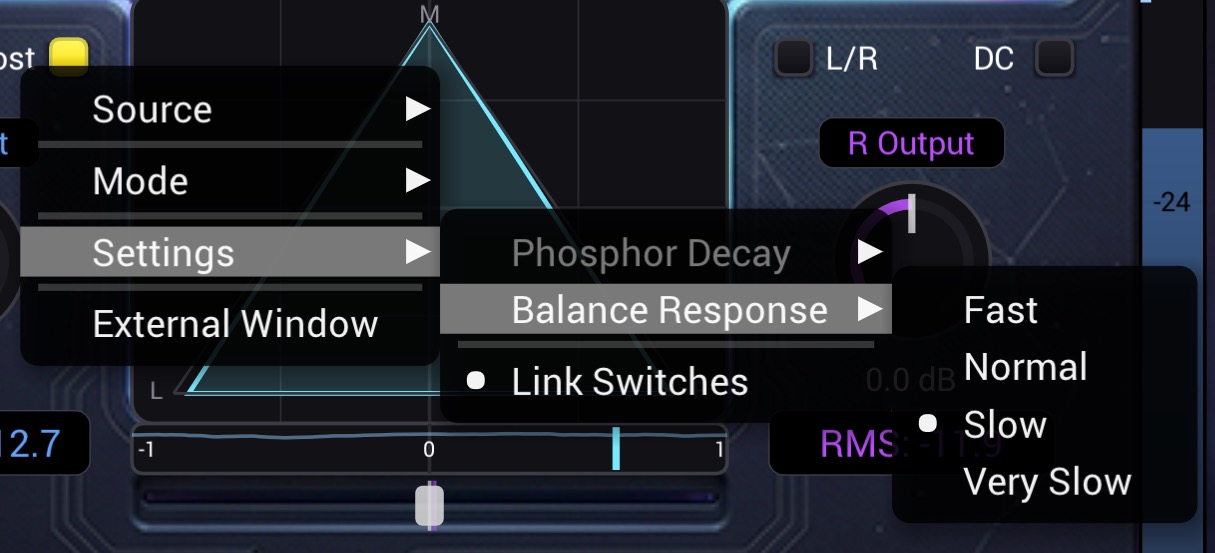
- Balance-O-Meter — one RMS triangle: apex fixed at M; wider symmetric base = more stereo; pan extends the louder side toward L or R at the base (the shape does not slide). Correlated mono = vertical line on M. Balance Response → Slow factory default — see Response Times.
- Phosphor Decay — in Settings for vector modes (Fast / Normal / Slow). Normal factory default. Phosphor is always on. Greyed out in Balance-O-Meter mode (no effect there). See Response Times for exact frame counts and durations.
- Link Switches (in Settings): On factory default for that scope (main or external — each has its own toggle). Pre/Post mirrors to Source; L/R ↔ M/S mirrors to goniometer Mode (M/S while M/S is on, restore previous when back to L/R). Does not change Source when you press L/R/M/S.
Reading the shape
- A tall, narrow vertical shape = mostly mono / centred.
- A round, spread cloud = wide stereo.
- A shape tilted to one diagonal = a level or phase imbalance toward that side.
Tip. Double-click the goniometer for fullscreen; drag a corner to resize the window if you need more room. Double-click again to exit. Phosphor decay and auto-gain are in the right-click menu.
Spectrum Analyzer
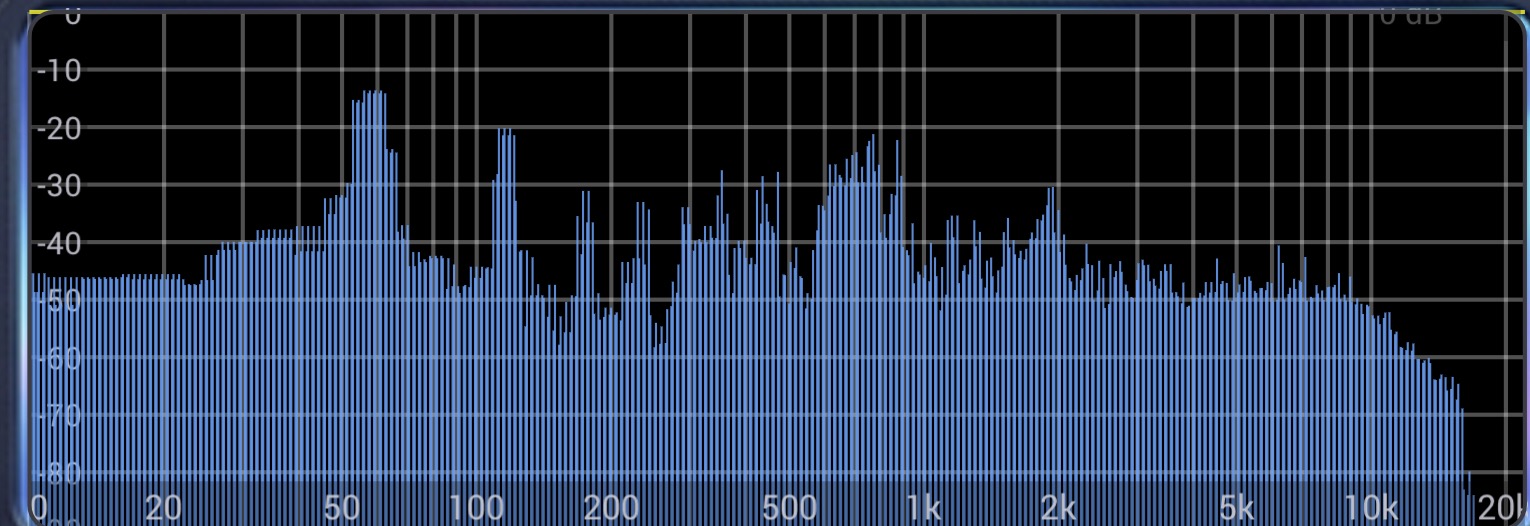
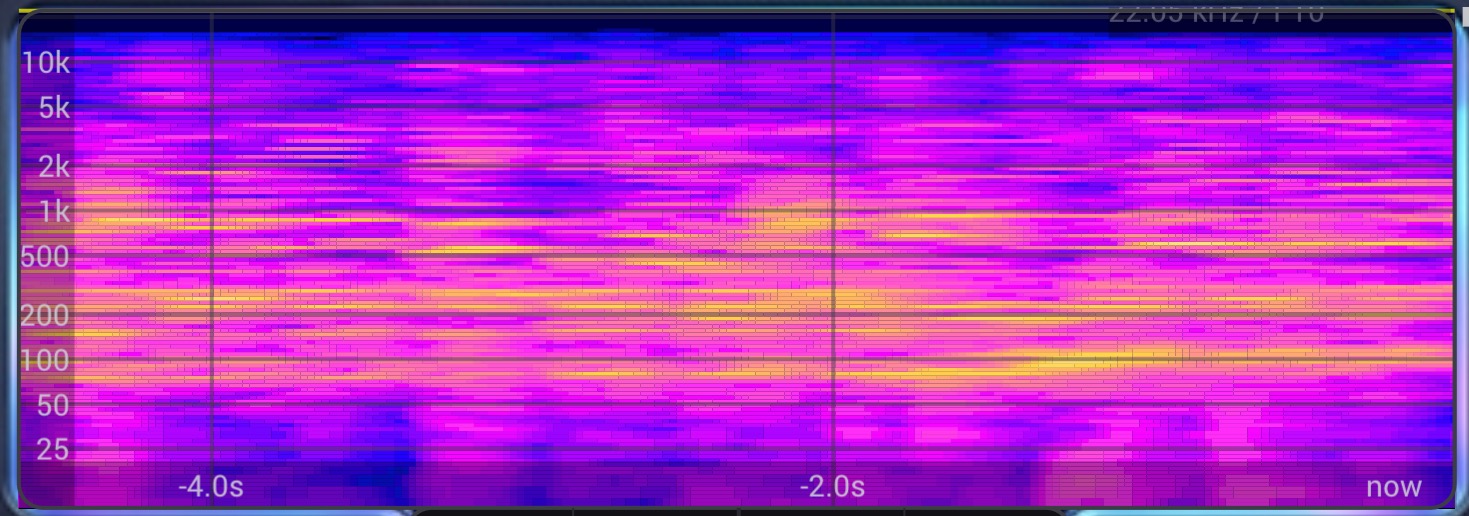
A real-time analyzer shows the frequency content of your signal, drawn in the channel colours. Right-click anywhere on it for the full settings menu.
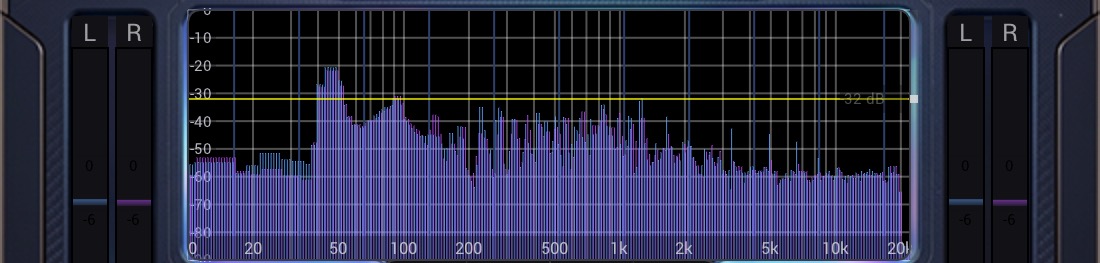
Display modes
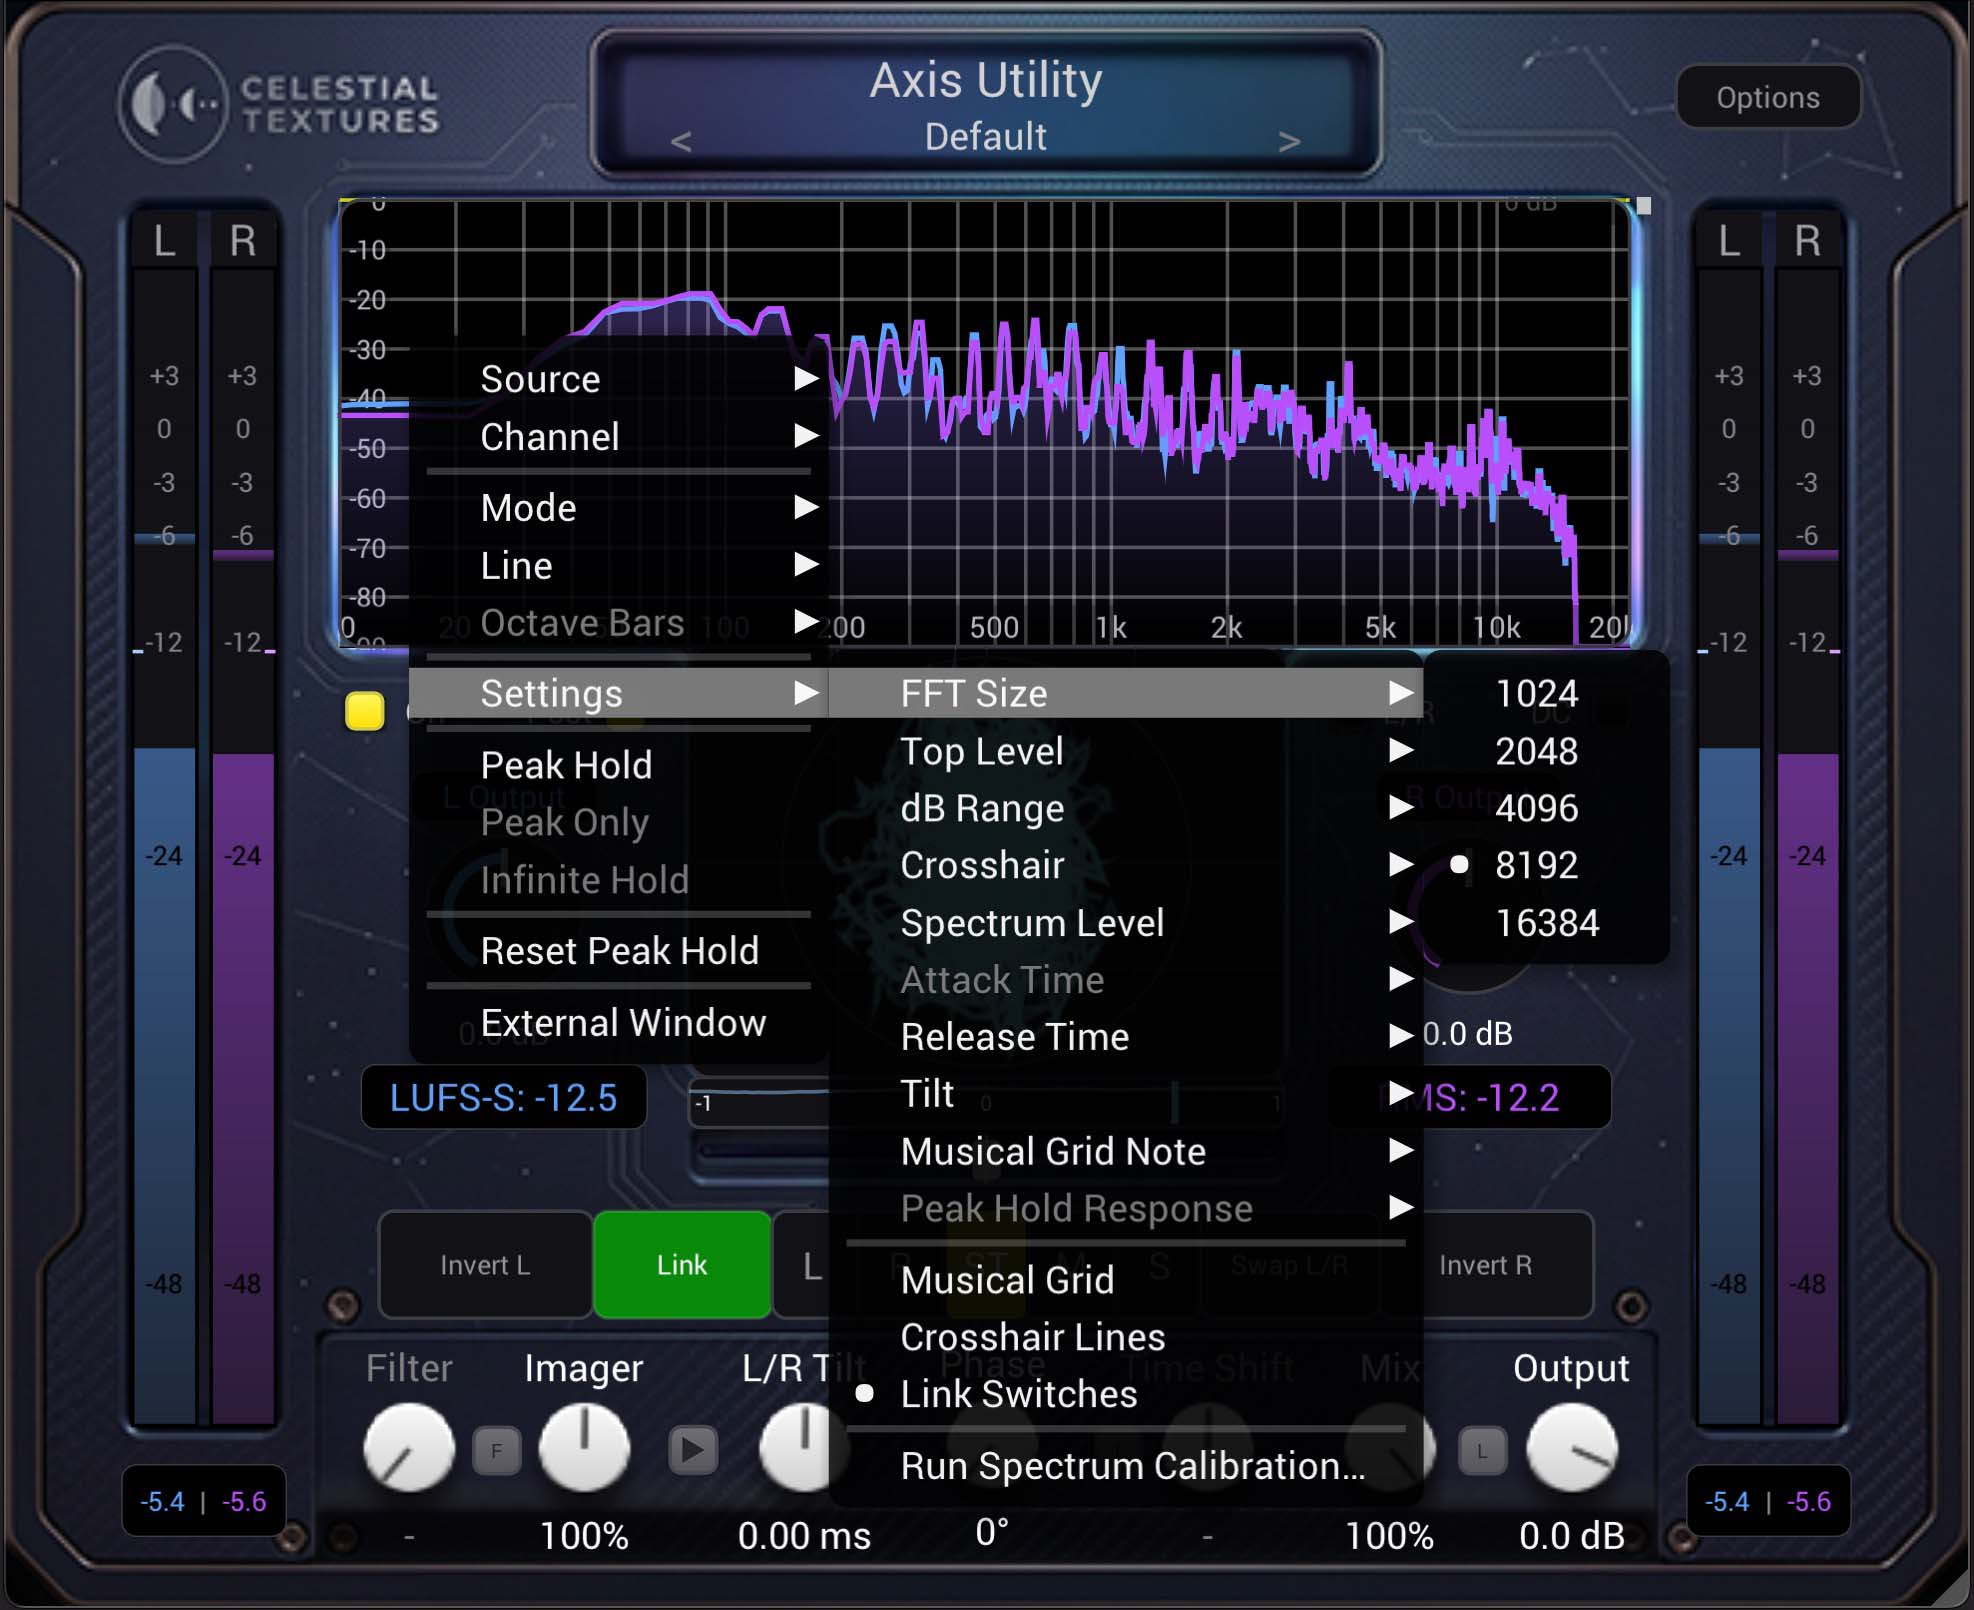
Key settings (right-click)
| Setting | What it does |
|---|---|
| Source | Input, Output, or Wet. Output factory default |
| Channel | Stereo L/R, M/S, Mono, or Single → Left / Right / Mid / Side. Stereo factory default |
| FFT Size | 1024–16384 in right-click Settings. 8192 factory default |
| Frequency Axis | Logarithmic or Linear. Log factory default |
| Spectrum Level | Peak factory default or Average — see Response Times for exact ballistics. |
| Smoothing | Octave smoothing on the Line trace. 1/48 oct factory default |
| Attack / Release | Normal / Normal factory default — Attack in Average only; Release in both Average and Peak. See Response Times. |
| Peak Hold Response | Very Fast factory default when Peak Hold is on — how long the white overlay stays frozen before falling (separate from Release). See table. |
| Tilt | Spectral tilt. Off factory default |
| dB Range & Top Level | Floor −90 dB · top 0 dBFS factory default |
| Crosshair | Spectrum dB factory default or Scale dB (grid ruler) |
| Link Switches | On factory default (per scope — main or external): Pre/Post → Source; L/R ↔ M/S → Channel (M/S while M/S on, restore when L/R). Does not change Source on L/R/M/S. |
| Run Spectrum Calibration… | Internal sine peak self-test (44.1–192 kHz); PASS/FAIL report — see Spectrum calibration |
| Peak Hold | Freeze peak levels on the spectrum (white caps/lines) and on IN/OUT level meters (bar peak tick + numeric readout). Hold duration before fall is Peak Hold Response (Settings), or use Infinite Hold. Reset Peak Hold clears spectrum and meter peaks. |
| Musical Grid / Crosshair Lines | Note-name grid and crosshair overlay lines. |
| Theme / Gradient | Colour theme and optional gradient fill. |
Spectrum ballistics
The live spectrum (blue line or bars) and the white Peak Hold overlay use different timing controls. Attack, Release, and Peak Hold Response are documented with full tables on the dedicated Response Times page — including what applies in Average vs Peak spectrum level, FFT hop timing, and goniometer Phosphor Decay.
Crosshair dB readout
Settings → Crosshair (Line / Octave Bars only — Spectrogram hover has no dB tag):
| Mode | What it shows |
|---|---|
| Scale dB | dB position on the chart grid (Y-axis ruler) |
| Spectrum dB | Measured level at the cursor frequency (Peak or Average per Spectrum Level) factory default |
Tip. For level checks against meters, use Spectrum dB crosshair mode with Spectrum Level → Peak.
Peak Hold (root menu)
| Option | Effect |
|---|---|
| Peak Hold | Latches peaks on spectrum + IN/OUT meter peak ticks |
| Infinite Hold | Hold never decays until reset |
| Peak Only | Octave Bars: show hold trace only (requires Peak Hold) |
| Reset Peak Hold | Clears spectrum hold and meter peaks |
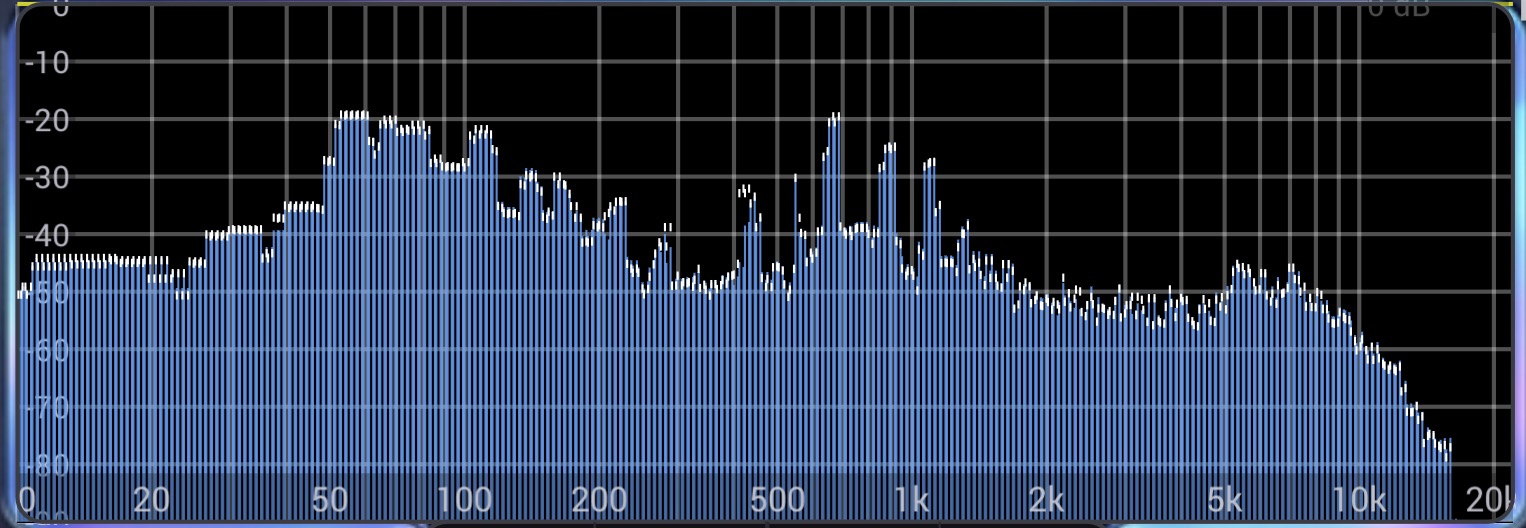
Spectrum peak calibration
Axis Utility ships with a built-in spectrum peak calibration self-test. It checks that Spectrum Level → Peak and Crosshair → Spectrum dB read correctly. One click, no extra gear.
No audio interface required. The test runs internally. Your DAW project rate and sound card do not affect the result — every user gets the same PASS/FAIL.
How to run: right-click the spectrum analyzer → Settings → Run Spectrum Calibration…
(or use the same entry in the standalone View → Analyzer menu). A dialog reports PASS or FAIL and
writes a full report to analyzer_calibration_report.txt in your user support folder
(macOS: ~/Library/Application Support/Celestial Textures/Axis Utility/ ·
Windows: %ProgramData%\Celestial Textures\Axis Utility\).
Each case passes when the measured level is within ±0.75 dB of the expected dBFS value. The report lists every case, the worst error, and an overall RESULT: PASS or FAIL.
Tip. In Spectrum Level → Peak with Crosshair → Spectrum dB, a steady 1 kHz tone at 0 dBFS should read close to your peak meters.
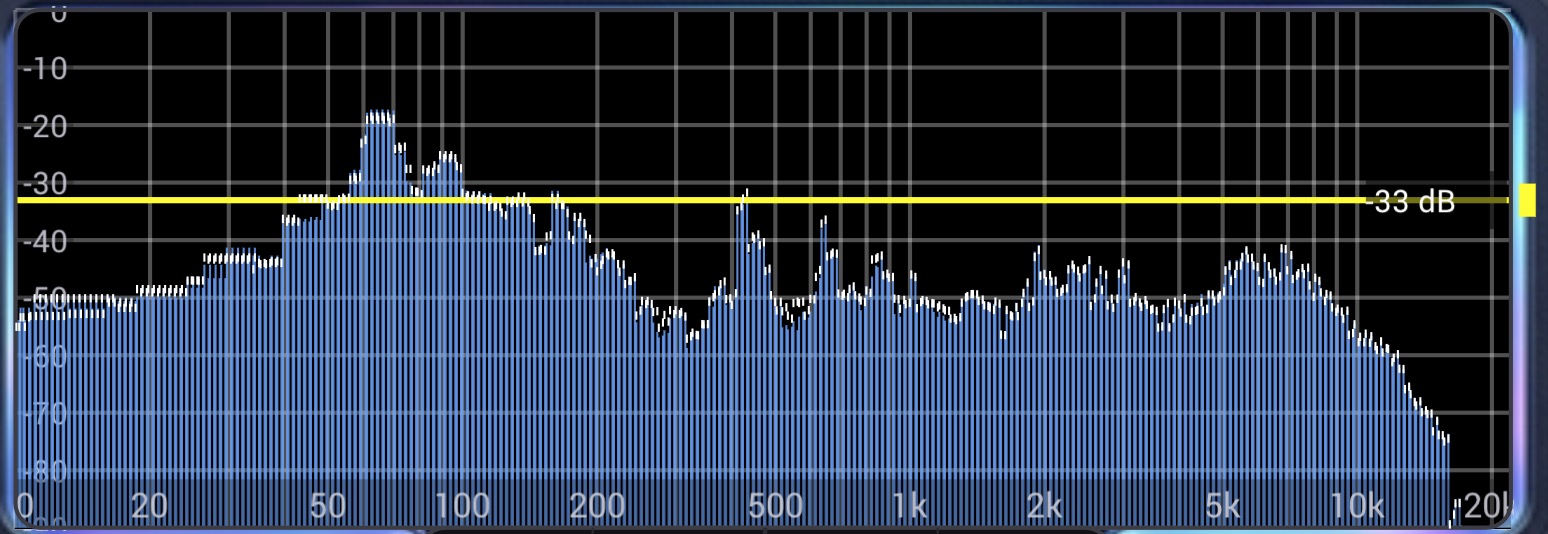
Threshold line
Drag the slim vertical control at the right edge of the analyzer to set a horizontal
threshold line on the plot. The position is saved with projects and .axpreset files.
In Line / Octave Bars the readout is dB. In Spectrogram it is
Hz / kHz / note, locked to musical notes (C, C#, D, … at A4 = 440 Hz) so every
pitch in every octave from 10 Hz to Nyquist is reachable. Scroll the mouse wheel on the
right-edge control to step one semitone; double-click jumps to the highest note. Spectrogram hover
shows frequency + note only — no dB tag. While Spectrogram is active, Settings → Top Level,
Crosshair, and Crosshair Lines are disabled.
Zoom & navigation
In Line and Octave Bars modes you can zoom the display for a closer look at part of the spectrum:
- Frequency zoom — ⌘ Cmd (macOS) / Ctrl (Windows) + mouse wheel, or drag the Hz readout at the top of the crosshair, or the horizontal strip along the bottom edge of the plot.
- dB zoom — ⌥ Option / Alt + mouse wheel, or drag the dB readout on the left of the crosshair vertically.
- Pan — when zoomed, middle-click drag, or hold ⌘ Cmd (macOS) / Ctrl (Windows) and drag inside the plot or on the horizontal freq / vertical dB rulers to move the zoomed view.
- Reset — double-click the Hz tag to reset frequency zoom; double-click the dB tag to reset amplitude zoom.
In Spectrogram mode the view scrolls in time automatically. Zoom uses the same modifier→axis idea as Line/Octave, remapped to spectrogram axes:
- Y / frequency zoom — ⌥ Option / Alt + mouse wheel, or drag the left frequency ruler vertically.
- X / time zoom — ⌘ Cmd / Ctrl + mouse wheel, or drag the bottom time labels horizontally.
- dB colour zoom — Shift + mouse wheel, or Shift + drag the left ruler (colour range, not the Y axis).
- Pan — when zoomed, ⌘/Ctrl + drag or middle-click (X pans time, Y pans frequency; colour-only zoom pans dB).
- Reset — double-click left ruler (frequency); Shift+double-click left (dB); double-click bottom time band (time).
- Mode switch — entering or leaving Spectrogram resets frequency, dB, and time zoom.
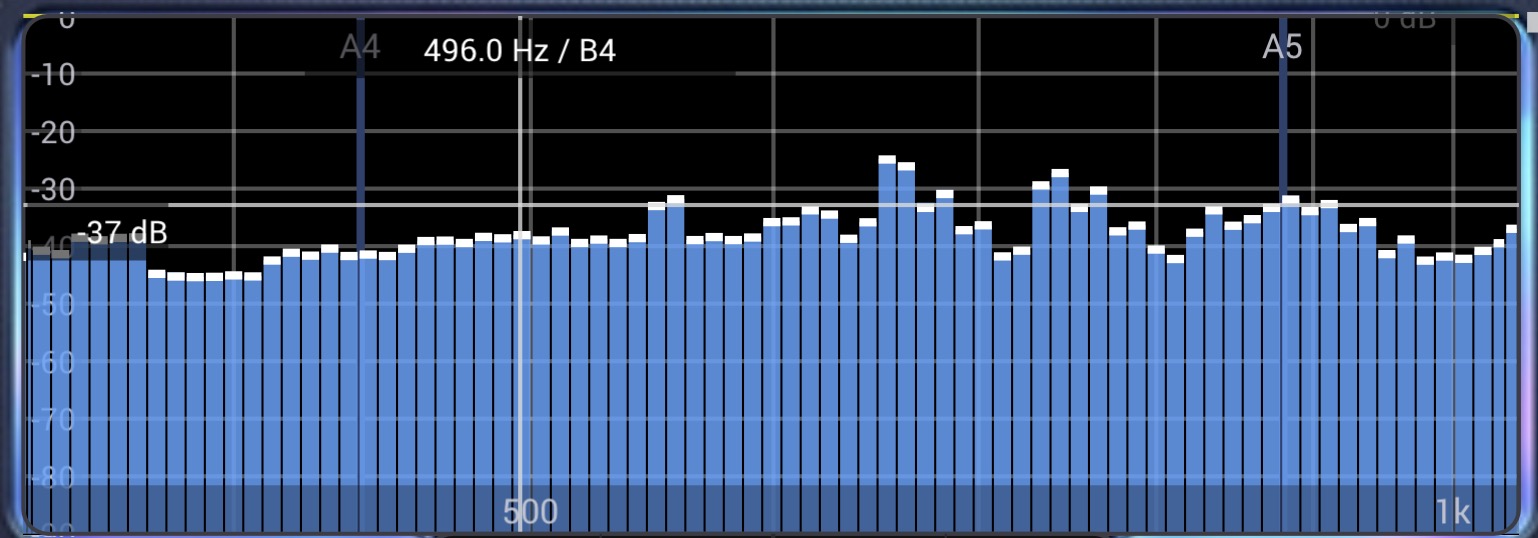
Tip. Hover the analyzer to read the exact frequency (and musical note) under the cursor. Double-click for in-plugin fullscreen; in the standalone app, right-click → External Window for a detached view with its own settings menu.
Options Panel
The Options button (top bar) opens an overlay with global preferences. These are saved with
your project and your .axpreset files. Goniometer mode, analyzer FFT size, phosphor decay,
and scope source/channel are set from each scope's right-click menu — not here.
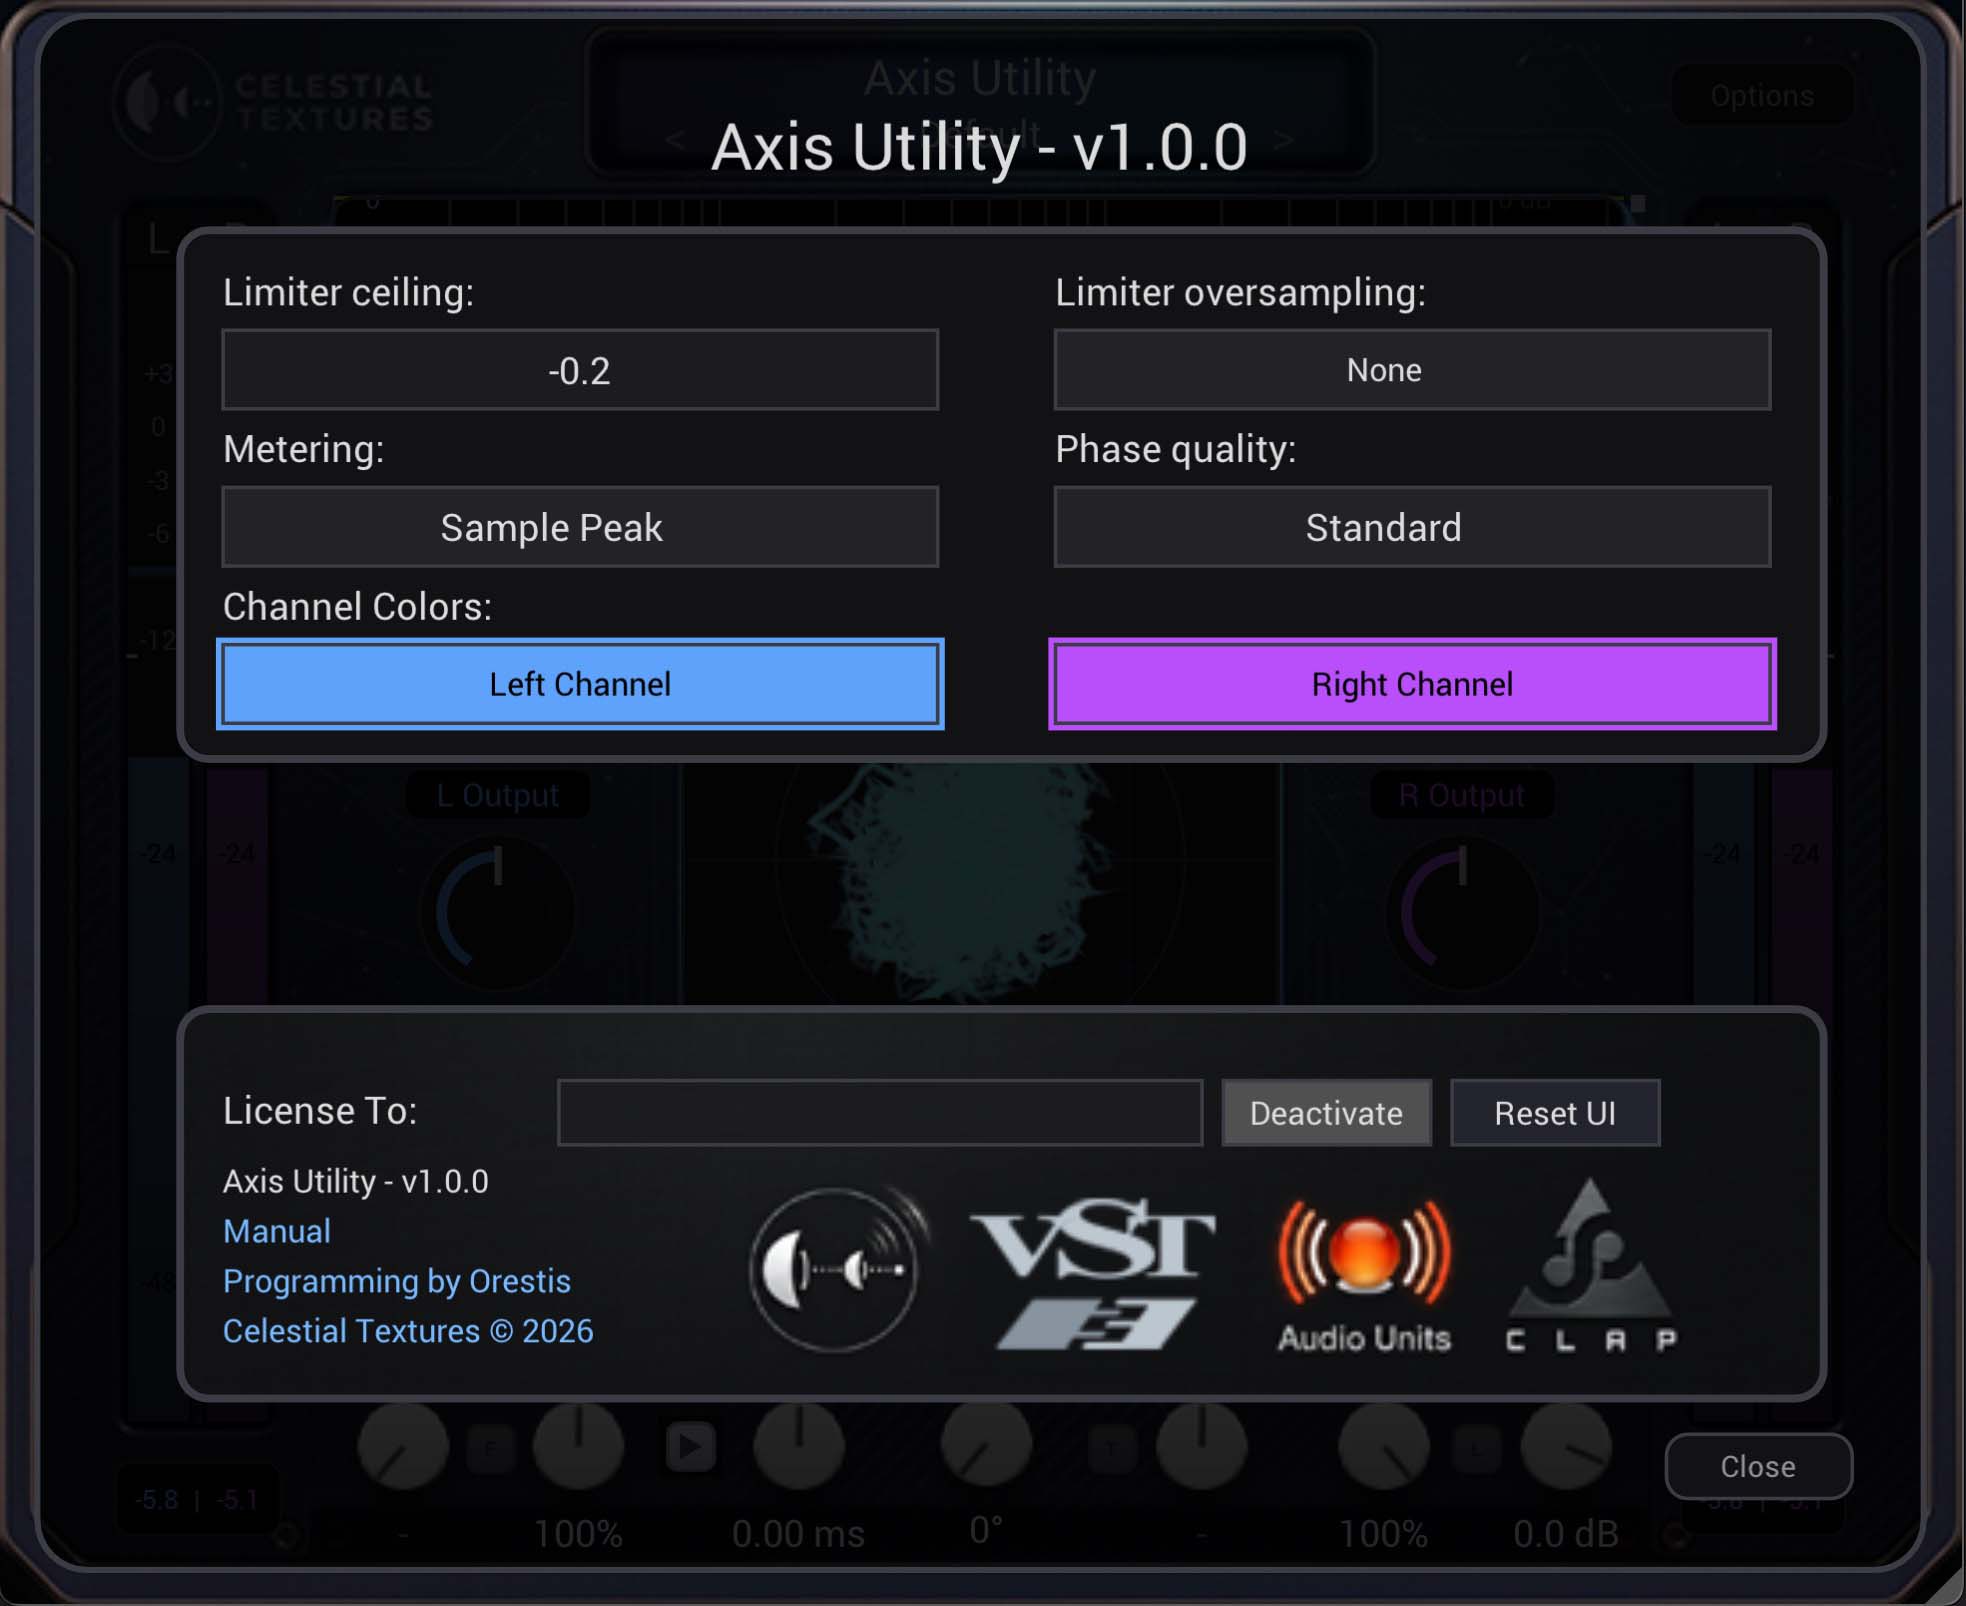
| Option | Description | Factory default |
|---|---|---|
| Limiter ceiling | Type a value from 0.0 to −24.0 dBFS, or drag the yellow ◀ on the output meter. | −0.2 dBFS factory default |
| Limiter oversampling | None, 2×, 4×, 8×, 16×, 32×, 64×, or 128×. | None factory default |
| Metering | Sample Peak or True Peak (dBTP) on output peak readouts. True Peak holds the highest output dBTP until you click to reset. | Sample Peak factory default |
| Phase quality | Standard / High / Ultra — see Phase. | Standard factory default |
| Channel Colours | Set the Left and Right colours used everywhere. | Blue L · Purple R factory default |
| License | Enter serial → Submit to activate (internet). Deactivate frees a slot. | — |
| Reset UI | Restores default window scale and resets Left / Right channel colours to factory defaults (blue / purple), applied to meters, knobs, analyzer, and related UI. Does not clear a saved Default Preset (user_default.axpreset). | — |
| Links | Manual, Programming by Orestis, Celestial Textures © 2026. | — |
Factory defaults at a glance
Every control below matches the factory Default. If you used Save as Default Preset,
new instances and Default Preset use your saved settings
(user_default.axpreset) instead.
Timing menus are detailed on Response Times.
| Area | Setting | Factory default |
|---|---|---|
| Gains | L/R/M/S Input & Output trims | 0 dB |
| Link Channels | On | |
| Pan | Centre | |
| Mix | 100% wet | |
| Output | 0 dB | |
| Imager | 100% (normal stereo width) | |
| Imager Filter | Off | |
| Phase | P Off · knob 0° | |
| Channel | Listen mode | ST (stereo) |
| Swap / Invert | Off | |
| Pre/Post metering | Post | |
| M/S Mode | Off (L/R) | |
| Limiter | Enabled | Off |
| Ceiling | −0.2 dBFS | |
| Oversampling | None | |
| Readouts | LUFS display | LUFS-ST (3 s) |
| Crest / RMS | RMS | |
| Goniometer | Display mode | Lissajous |
| Source | Output | |
| Auto-Gain | On | |
| Phosphor Decay | Normal | |
| Balance Response | Slow (Balance-O-Meter only) | |
| Link Switches | On | |
| Analyzer | Display mode | Line |
| FFT size | 8192 | |
| Source | Output | |
| Channel | Stereo L/R | |
| Frequency axis | Log | |
| Spectrum Level | Peak | |
| Attack / Release | Normal / Normal (3 ms / 150 ms) | |
| Peak Hold Response | Very Fast (when Peak Hold on) | |
| Line smoothing | 1/48 oct | |
| dB floor / top | −90 dB / 0 dBFS | |
| Crosshair dB | Spectrum dB | |
| Musical Grid | On (root C) | |
| Link Switches | On | |
| Options | Phase quality | Standard |
| Peak metering | Sample Peak |
Tip. Double-click most knobs to return them to the values above. Default Preset recalls Default (your saved Default if you have one).
Presets
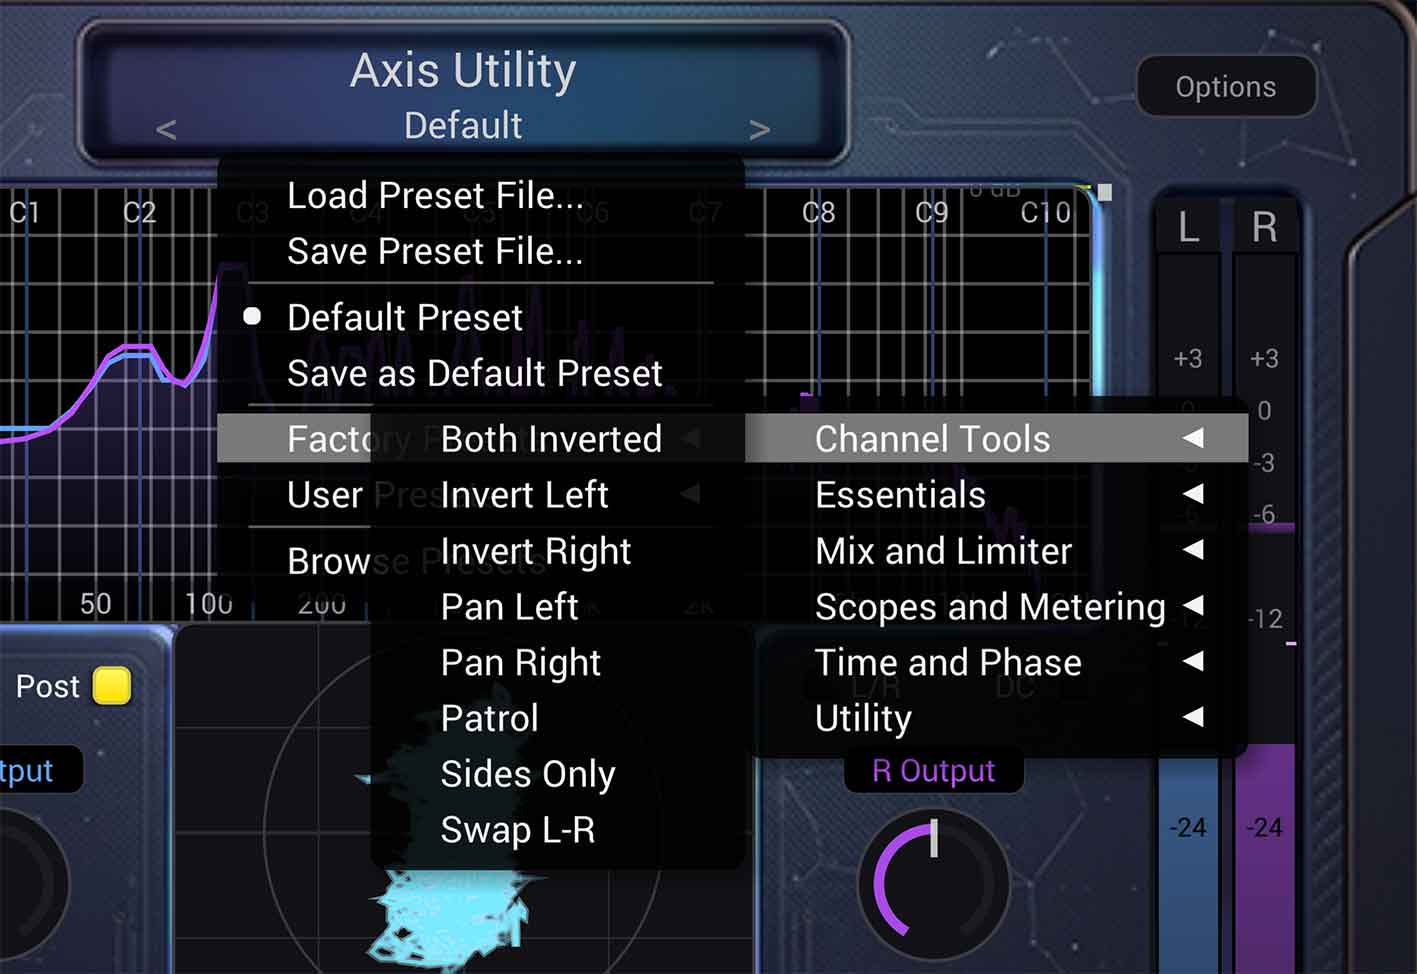
Under the title bar, | < | preset name | > | lets you step
through and manage presets.
- Arrows — ring: Default → factory programs → user presets → back to Default.
- Click the preset name — opens the full preset menu.
- Factory Presets — 32 ready-made programs in six category submenus. See the Factory Presets reference for every program explained. Default is on the main menu only. A checkmark marks the active preset and its category folder.
- User Presets — files in your user presets folder (listed when the menu opens). Subfolders appear as nested menus. A checkmark marks the active preset and its folders.
- Default Preset — recalls Default. If you used Save as Default Preset, that is what loads; otherwise the factory Default program.
- Save as Default Preset — after confirmation, stores the current settings as Default
for new instances and for Default Preset (
user_default.axpresetin the settings folder). It does not appear under User Presets. Reset UI does not remove it. Uninstall keeps it unless you also remove settings. - Save / Load / Browse — write or open
.axpresetfiles; browse the user folder.
Bundle location. Factory presets ship with each format (33 .axpreset files: 32 programs in six category folders + Default.axpreset at bundle root):
Contents/Resources/FactoryPresets/ (macOS VST3/AU/.app);
…\Axis Utility.vst3\Contents\Resources\FactoryPresets\ (Windows VST3);
C:\Program Files\Common Files\CLAP\FactoryPresets\ (Windows CLAP);
FactoryPresets\ next to Axis Utility.exe (Windows standalone).
Your saved presets live in the user data folder (Presets\ on Windows), not in Program Files.
Step through presets. Use the arrows under the title bar to move through the ring (Default → factory bank → your files → Default).
What presets store. Parameters, channel colours, limiter/analyzer/gonio view, and MIDI learn — not window zoom. In plug-in formats, zoom is saved per instance in the DAW project. In the standalone APP, zoom is remembered with the app.
MIDI Learn
Map MIDI CC controllers to plugin parameters. Eligible controls: all eight gain trims, Pan, Imager, Filter frequency, L/R Tilt, the Phase knob, the Time Shift knob, Mix, Output, Invert L, Invert R, Listen (L / R / ST / M / S), Link, and Swap. Other toggles (P, T, F, M/S, etc.) are not MIDI-learnable.
- Arm: Ctrl+Shift+click a knob or eligible control.
- Learn: move a MIDI CC on your controller — the assignment is stored.
- Clear that parameter's mapping: Ctrl+Alt+click the control.
- Cancel arm: click elsewhere while armed.
The CC→parameter map is saved with DAW projects and .axpreset files. Pickup behaviour
avoids jumps when the hardware knob does not match the current parameter value.
Listen on pads (fixed CC values)
Listen is one parameter learned to one CC. On a controller like a Korg nanoKONTROL you can assign several pads to that same CC with min = max set to a fixed value so each pad jumps to one Listen cell:
| Listen | CC value range | Recommended fixed (min=max) |
|---|---|---|
| L | 0–15 | 0 |
| R | 16–47 | 32 |
| ST | 48–79 | 64 |
| M | 80–111 | 95 |
| S | 112–127 | 127 |
Tip. Configure pads so they do not send value 0 on release (or use latch), otherwise Listen will snap back to L. Hold Shift while sending L or R to hear that channel in both speakers (dual-mono — same as Shift+click on the selector). Boolean toggles (Invert L/R, Link, Swap): CC below ~64 = Off, ~64 and above = On.
Bypass
The plugin title doubles as an in-plugin bypass. Click Axis Utility to bypass all processing — while bypassed the title reads Bypass and audio passes through untouched. When processing is active the title shows Axis Utility in light grey (brightening on hover). This is independent of your host's own bypass button — either one will silence processing.

License & Trial
Activation
Open Options → enter your license serial → Submit. Requires an internet connection.
Demo mode
Without a valid license, Axis Utility runs in demo mode:
- 14-day trial from first launch.
- 30 minutes of audio per day while in demo.
- A DEMO badge on the title bar shows days and minutes remaining (e.g.
DEMO 12d 28m).
Deactivate
Options → Deactivate (when licensed) frees a machine slot on the server.
Status badges
| Badge | Meaning |
|---|---|
| DEMO | Trial or demo mode active |
| UPDATE! | A newer version is available on the server |
| LICENSE ERROR | Tampered license, clock rollback, or verification failure — audio muted |
Support. celestialtextures.com · info@celestialtextures.com
Workflows & Tips
Fix a lopsided stereo file
- Insert Axis Utility, set Pre/Post to Post.
- Watch the balance meter; trim the louder channel with its gain knob (Link off).
- If the channels are reversed, use Swap.
Widen without losing the low end
- Turn the Filter On, set the frequency ~150 Hz.
- Raise the Imager above 100%.
- Check mono compatibility with Listen → M and the correlation meter.
Tighten a mix bus for limiting
- Use Phase to balance asymmetric transients.
- Engage the Limiter with oversampling, ceiling around −1 dBTP.
- Confirm loudness with LUFS-ST (or LUFS-I after a full pass).
Time-align two sources
- Coarse-align with Time Shift.
- Fine-tune inter-channel timing with L/R Tilt.
- Maximise the upward spread on the goniometer / push correlation toward +1.
Troubleshooting / FAQ
The plugin doesn't appear in my DAW.
Confirm you copied the correct format to the correct folder (see macOS / Windows), then rescan/validate plugins. Some DAWs cache scans — a full rescan or restart may be required.
Blended (Mix < 100%) audio sounds hollow or phasey.
Axis Utility delay-aligns the dry path to the wet path when both contribute at Mix and latency-adding features (Filter, Phase, or Time Shift) are active. If you still hear combing, try 100% wet or disable those features for parallel blends.
My track is slightly out of sync with others.
Make sure host delay compensation (PDC) is enabled. Axis Utility reports its latency; with Time Shift or the Imager Filter on, the host needs PDC active to keep tracks aligned.
Time Shift at −50 ms sounds the same as turning T off.
That host is not delaying the other tracks to match the 50 ms Time Shift reports. Ableton Live often behaves this way. Use 0 ms or positive values, or move the clip. Confirm Live’s Delay Compensation is on, and judge this on playback rather than input monitoring. Also see Time Shift.
The LUFS / loudness reading looks off at unusual sample rates.
Axis Utility supports project sample rates from 44.1 kHz up to 192 kHz (see Specifications). Loudness metering is calibrated for the common rates in that range (44.1 / 48 kHz and their multiples). At those rates, LUFS-ST, LUFS-M, and LUFS-I track EBU R128 as expected. Use right-click on the LUFS readout to reset integrated loudness before a new measurement.
Where are my settings stored?
macOS: ~/Library/Application Support/Celestial Textures/Axis Utility/ ·
Windows: %ProgramData%\Celestial Textures\Axis Utility\.
If you used Save as Default Preset, that folder also holds user_default.axpreset.
How do I restore the factory Default?
While a saved Default exists, Default Preset uses that.
Delete user_default.axpreset from the settings folder, or uninstall and choose to remove
settings. Then Default Preset is the factory program again.
Factory presets list is empty.
Reinstall from a current build so FactoryPresets/**/*.axpreset are present (32 programs in six category folders + Default.axpreset;
see Presets): macOS plug-ins and Axis Utility.app use
Contents/Resources/FactoryPresets/; Windows VST3 uses
…\Axis Utility.vst3\Contents\Resources\FactoryPresets\; Windows CLAP uses
C:\Program Files\Common Files\CLAP\FactoryPresets\; Windows standalone uses
FactoryPresets\ next to Axis Utility.exe.
Standalone app shows no window or quits immediately (macOS).
Reinstall from a current build. If macOS blocked the app, allow it under System Settings → Privacy & Security, or remove the quarantine flag (see Installation — macOS).
Why doesn't the RMS label match the meter fill?
They are both RMS measurements, but not the same one. The filled bar is per-channel short-term RMS (~5 ms); the RMS readout under the right knob is stereo combined RMS over 300 ms. Peaks (tick + numeric readout) will always sit higher on dynamic material. See Fill vs peak tick vs RMS label.
Can I resize the window?
Yes — drag the bottom-right corner. In plug-in formats (VST3, CLAP, AU), zoom is stored per instance in the DAW project. In the standalone APP, zoom is remembered with the app. You can also double-click the goniometer or analyzer for a temporary fullscreen view.
Analyzer fullscreen or external window feels slow or freezes briefly.
Spectrogram mode is the heaviest view. A short hitch when switching modes or FFT size is normal.
Specifications
| Item | Detail |
|---|---|
| Type | Stereo utility / metering effect |
| Channels | Stereo in / stereo out (2-in, 2-out) |
| Formats | VST3, CLAP, AU (macOS), and standalone application |
| Platforms | macOS 11.0+ (Apple Silicon & Intel) · Windows 10+ (64-bit) |
| Sample rates | 44.1, 48, 88.2, 96, and 192 kHz (maximum) |
| Analyzer calibration | Internal FFT peak self-test at all supported rates; ±0.75 dB — details |
| Latency | 0 samples by default; +50 ms when Time Shift T is on; +128 samples with Imager Filter; Phase rotator group delay when P is on — all host-compensated (PDC) |
| Metering | Peak (sample & true-peak), LUFS short-term / momentary / integrated (EBU R128), crest factor & RMS, correlation, balance |
| Scopes | Goniometer (6 modes) and real-time spectrum analyzer (Line / Octave / Spectrogram) |
| State | Full plugin state in DAW projects and .axpreset files |
| Version | 1.0.0 |